
You also want an ePaper? Increase the reach of your titles
YUMPU automatically turns print PDFs into web optimized ePapers that Google loves.
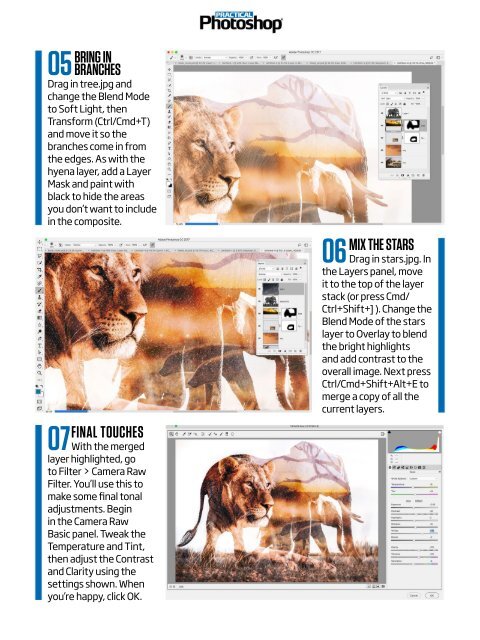
05<br />
BRING IN<br />
BRANCHES<br />
Drag in tree.jpg and<br />
change the Blend Mode<br />
to Soft Light, then<br />
Transform (Ctrl/Cmd+T)<br />
and move it so the<br />
branches come in from<br />
the edges. As with the<br />
hyena layer, add a Layer<br />
Mask and paint with<br />
black to hide the areas<br />
you don’t want to include<br />
in the composite.<br />
07<br />
FINAL TOUCHES<br />
With the merged<br />
layer highlighted, go<br />
to Filter > Camera Raw<br />
Filter. You’ll use this to<br />
make some final tonal<br />
adjustments. Begin<br />
in the Camera Raw<br />
Basic panel. Tweak the<br />
Temperature and Tint,<br />
then adjust the Contrast<br />
and Clarity using the<br />
settings shown. When<br />
you’re happy, click OK.<br />
06<br />
MIX THE STARS<br />
Drag in stars.jpg. In<br />
the Layers panel, move<br />
it to the top of the layer<br />
stack (or press Cmd/<br />
Ctrl+Shift+] ). Change the<br />
Blend Mode of the stars<br />
layer to Overlay to blend<br />
the bright highlights<br />
and add contrast to the<br />
overall image. Next press<br />
Ctrl/Cmd+Shift+Alt+E to<br />
merge a copy of all the<br />
current layers.