
Create successful ePaper yourself
Turn your PDF publications into a flip-book with our unique Google optimized e-Paper software.
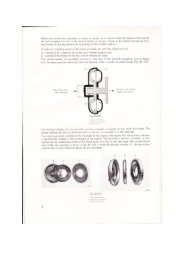
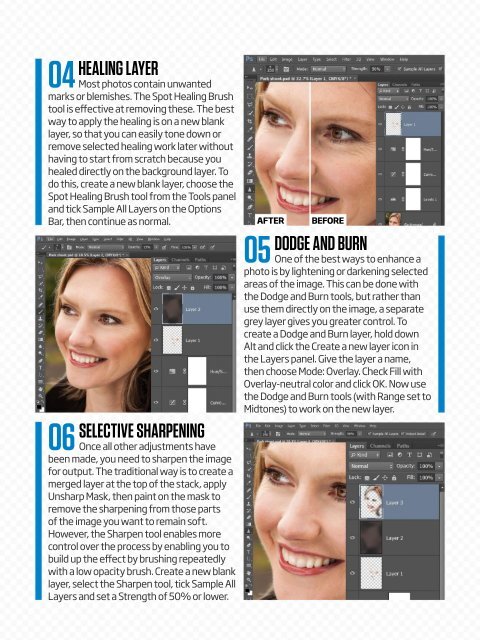
04<br />
06<br />
HEALING LAYER<br />
Most photos contain unwanted<br />
marks or blemishes. The Spot Healing Brush<br />
tool is effective at removing these. The best<br />
way to apply the healing is on a new blank<br />
layer, so that you can easily tone down or<br />
remove selected healing work later without<br />
having to start from scratch because you<br />
healed directly on the background layer. To<br />
do this, create a new blank layer, choose the<br />
Spot Healing Brush tool from the Tools panel<br />
and tick Sample All Layers on the Options<br />
Bar, then continue as normal.<br />
SELECTIVE SHARPENING<br />
Once all other adjustments have<br />
been made, you need to sharpen the image<br />
for output. The traditional way is to create a<br />
merged layer at the top of the stack, apply<br />
Unsharp Mask, then paint on the mask to<br />
remove the sharpening from those parts<br />
of the image you want to remain soft.<br />
However, the Sharpen tool enables more<br />
control over the process by enabling you to<br />
build up the effect by brushing repeatedly<br />
with a low opacity brush. Create a new blank<br />
layer, select the Sharpen tool, tick Sample All<br />
Layers and set a Strength of 50% or lower.<br />
AFTER<br />
05<br />
BEFORE<br />
DODGE AND BURN<br />
One of the best ways to enhance a<br />
photo is by lightening or darkening selected<br />
areas of the image. This can be done with<br />
the Dodge and Burn tools, but rather than<br />
use them directly on the image, a separate<br />
grey layer gives you greater control. To<br />
create a Dodge and Burn layer, hold down<br />
Alt and click the Create a new layer icon in<br />
the Layers panel. Give the layer a name,<br />
then choose Mode: Overlay. Check Fill with<br />
Overlay-neutral color and click OK. Now use<br />
the Dodge and Burn tools (with Range set to<br />
Midtones) to work on the new layer.