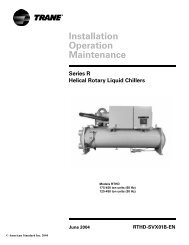
RTHD and RTAC - Trane
RTHD and RTAC - Trane
RTHD and RTAC - Trane

You also want an ePaper? Increase the reach of your titles
YUMPU automatically turns print PDFs into web optimized ePapers that Google loves.
CAUTION<br />
Equipment<br />
Damage!<br />
Current Transformers<br />
above the Chilled Water Setpoint by more than the “differential to start”<br />
setting, in order to stage on the first compressor.<br />
At startup, verify the appropriate contactor(s) pull-in. The starting compressor<br />
can be determined in TechView. The mode will change from stopped to<br />
starting. This can also been seen on the DynaView under the Modes tab. Note<br />
the diagnostic(s) that results, then place the Chiller into the “Stop” mode.<br />
3 For the next portion of the procedure, pull the unit's disconnect <strong>and</strong> interrupt<br />
all high voltage power to the control panel. Locate the toroid (doughnut)<br />
current transformers encircling the compressor power wiring <strong>and</strong> branching<br />
to the compressor contactors of the suspect compressor in the control panel.<br />
Refer to the Component Location Drawing in the panel to identify the<br />
particular current transformer(s) of interest. Locate the part number/UL tag on<br />
the transformer leads <strong>and</strong> note the <strong>Trane</strong> part number which identifies the<br />
transformers.<br />
4 Utilizing the Schematic Wiring Diagram, locate the termination of the<br />
transformer's wiring into the Phoenix plug at the appropriate Starter module<br />
at pin header J7. Pull off the appropriate Phoenix connector from the pin<br />
header on the Starter.<br />
Current Transformers can be damaged <strong>and</strong> high voltages can result due to<br />
running the compressors without a suitable burden load for the CTs. This load is<br />
provided by the Starter input. Take care to properly reconnect the CT's Phoenix<br />
connector prior to attempted start of the compressors.<br />
5 Using a digital volt-ohmmeter, measure the resistance of the transformer(s)<br />
by probing the appropriate pair(s) of receptacles within the Phoenix<br />
connector. The receptacle pairs of the Phoenix connector are most easily<br />
measured by using meter leads with pointed probes <strong>and</strong> contacting the<br />
exposed metal of the connector through the top Phoenix connector.<br />
6 Refer to Table 5 which lists the normal resistance range for each extension of<br />
current transformer. Check the measured resistance against the value listed<br />
per transformer extension. If the resistance is within tolerance, the<br />
transformer <strong>and</strong> Phoenix connector can be considered good. Go on to step 8.<br />
Table 5. Current Transformers Rating <strong>and</strong> Resistance<br />
Rating<br />
Usable Range Resistance Ohms<br />
Unit RLA Part Number<br />
(amps)<br />
(amps)<br />
(+10%)<br />
67-100 X13580269-01 100 66.67-100 23.5<br />
100-150 X13580269-02 150 100-150 35.0<br />
134-200 X13580269-03 200 134-200 46.0<br />
184-275 X13580269-04 275 184-275 67.0<br />
267-400 X13580269-05 400 267-400 68.0<br />
334-500 X13580269-06 500 334-500 89.0<br />
467-700 X13580269-07 700 467-700 128.0<br />
667-1000 X13580269-08 1000 667-1000 235.0<br />
33.4-50 X13580269-09 50 33.37-50 11.5<br />
50-75 X13580269-10 75 50-75 17.0<br />
28 RLC-SVD05A-EN