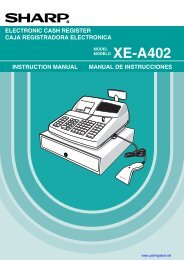
2 - Cash Registers
2 - Cash Registers
2 - Cash Registers

Create successful ePaper yourself
Turn your PDF publications into a flip-book with our unique Google optimized e-Paper software.
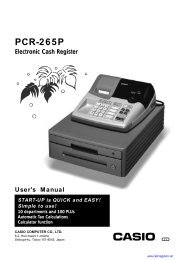
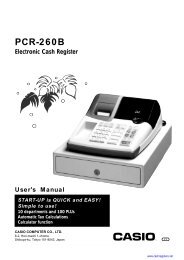
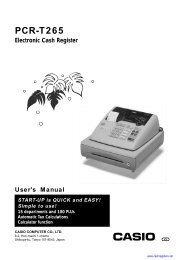
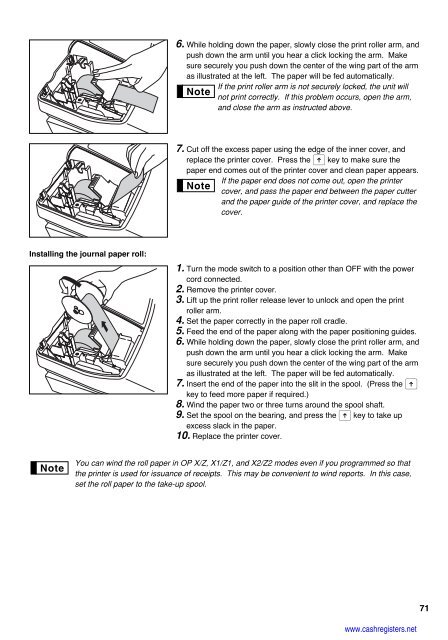
Installing the journal paper roll:<br />
6. While holding down the paper, slowly close the print roller arm, and<br />
push down the arm until you hear a click locking the arm. Make<br />
sure securely you push down the center of the wing part of the arm<br />
as illustrated at the left. The paper will be fed automatically.<br />
If the print roller arm is not securely locked, the unit will<br />
not print correctly. If this problem occurs, open the arm,<br />
and close the arm as instructed above.<br />
7. Cut off the excess paper using the edge of the inner cover, and<br />
replace the printer cover. Press the F key to make sure the<br />
paper end comes out of the printer cover and clean paper appears.<br />
If the paper end does not come out, open the printer<br />
cover, and pass the paper end between the paper cutter<br />
and the paper guide of the printer cover, and replace the<br />
cover.<br />
1. Turn the mode switch to a position other than OFF with the power<br />
cord connected.<br />
2. Remove the printer cover.<br />
3. Lift up the print roller release lever to unlock and open the print<br />
roller arm.<br />
4. Set the paper correctly in the paper roll cradle.<br />
5. Feed the end of the paper along with the paper positioning guides.<br />
6. While holding down the paper, slowly close the print roller arm, and<br />
push down the arm until you hear a click locking the arm. Make<br />
sure securely you push down the center of the wing part of the arm<br />
as illustrated at the left. The paper will be fed automatically.<br />
7. Insert the end of the paper into the slit in the spool. (Press the F<br />
key to feed more paper if required.)<br />
8. Wind the paper two or three turns around the spool shaft.<br />
9. Set the spool on the bearing, and press the F key to take up<br />
excess slack in the paper.<br />
10. Replace the printer cover.<br />
You can wind the roll paper in OP X/Z, X1/Z1, and X2/Z2 modes even if you programmed so that<br />
the printer is used for issuance of receipts. This may be convenient to wind reports. In this case,<br />
set the roll paper to the take-up spool.<br />
www.cashregisters.net<br />
71