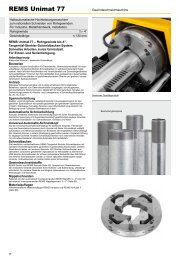
REMS Picus S1 REMS Picus S3 REMS Picus S2 / 3,5 REMS Picus ...
REMS Picus S1 REMS Picus S3 REMS Picus S2 / 3,5 REMS Picus ...
REMS Picus S1 REMS Picus S3 REMS Picus S2 / 3,5 REMS Picus ...

You also want an ePaper? Increase the reach of your titles
YUMPU automatically turns print PDFs into web optimized ePapers that Google loves.
eng eng<br />
1.7. Weights<br />
Drive unit 5.0 kg (11.1 lb) 7.4 kg (16.3 lb) 13.1 kg (29.1 lb) 6.35 kg (14.0 lb)<br />
<strong>REMS</strong> Simplex 2, drill stand 12.0 kg (26.4 lb)<br />
<strong>REMS</strong> Titan, drill stand 21.3 kg (47.3 lb)<br />
1.8. Noise emissions<br />
Sound pressure level 90 dB (A) 90 dB (A) 91 dB (A) 91 dB (A)<br />
Operating sound level 103 dB (A) 103 dB (A) 104 dB (A) 104 dB (A)<br />
K = 3 dB<br />
1.9. Vibrations<br />
Weighted effective value of acceleration 2.5 m/s² 2.5 m/s² 2.5 m/s² 2.5 m/s²<br />
K = 1.5 m/s²<br />
The indicated weighted effective value of acceleration has been measured against standard test procedures and can be used by way of comparison with another<br />
device. The indicated weighted effective value of acceleration can also be used as a preliminary evaluation of the exposure.<br />
CAUTION<br />
The indicated weighted effective value of acceleration can differ during operation from the indicated value, dependent on the manner in which the device is used.<br />
Dependent upon the actual conditions of use (periodic duty) it may be necessary to establish safety precautions for the protection of the operator.<br />
2. Initial startup<br />
2.1. Electrical connection<br />
Before connecting the machine, check to ensure that the mains voltage matches<br />
that indicated on the machine rating plate. Always check the PRCD fault currentsafety<br />
switch (19) for correct functioning before starting up at the beginning of<br />
each session (see 3.).<br />
2.2. <strong>REMS</strong> <strong>Picus</strong> drive units<br />
The <strong>REMS</strong> <strong>Picus</strong> drive units are universally applicable for both dry and wet<br />
drilling, either manually controlled (<strong>Picus</strong> <strong>S1</strong>, <strong>Picus</strong> <strong>S3</strong> and <strong>Picus</strong> SR) or with<br />
drill upright. The combined drill crown connection of the drive spindle (11) of<br />
<strong>REMS</strong> <strong>Picus</strong> <strong>S1</strong>, <strong>Picus</strong> <strong>S3</strong> and <strong>Picus</strong> SR allows both the direct mounting of<br />
diamond core drill crowns with internal thread UNC 1¼ and with external thread<br />
G ½. The <strong>Picus</strong> <strong>S1</strong>, <strong>Picus</strong> <strong>S3</strong> and <strong>Picus</strong> SR drive machines are not delivered<br />
with the water feeding device (15) pre-assembled but loose. The adapter for<br />
the water connection on the <strong>Picus</strong> <strong>S1</strong>, <strong>Picus</strong> <strong>S3</strong> and <strong>Picus</strong> SR drive machines<br />
is closed by a cover (14). In this condition the drive machines (<strong>Picus</strong> <strong>S1</strong>, <strong>Picus</strong><br />
<strong>S3</strong> and <strong>Picus</strong> SR) are used for dry drilling. The water feed device is already<br />
pre-assembled on the <strong>REMS</strong> <strong>Picus</strong> <strong>S2</strong>/3,5. For wet drilling, see 2.5.<br />
The drive-unit turning speed required for cost-effective core drilling depends<br />
on the diameter of the diamond core drilling crown. Select the turning speed<br />
of the drive unit in such a way that the peripheral speed (cutting speed) of the<br />
diamond core drilling crown runs within a range between 2 and 4 m/s. It is of<br />
course possible to carry out drilling operations outside this optimum range,<br />
albeit subject to reductions in the operating speed and/or service life of the<br />
diamond core drilling crown. Higher peripheral speed apply in masonry.<br />
The turning speed of the <strong>REMS</strong> <strong>Picus</strong> <strong>S1</strong> is adjusted to a fixed setting. From<br />
a drilling diameter of 62 mm, the <strong>REMS</strong> <strong>Picus</strong> <strong>S1</strong> operates in concrete in the<br />
optimum peripheral speed range, which always remains inside acceptable limits<br />
when smaller diameters are being handled. The attachment method used with<br />
the diamond-tipped segments of the <strong>REMS</strong> Universal diamond core drilling<br />
crown has been modified so that smaller diameters can also be drilled efficiently<br />
with the <strong>REMS</strong> <strong>Picus</strong> <strong>S1</strong>.<br />
The turning speed of the <strong>REMS</strong> <strong>Picus</strong> <strong>S3</strong> can be selected by means of a threespeed<br />
stepped drive to ensure that in concrete it always operates within the<br />
optimum drilling speed range. The correct speed can be taken from the machine<br />
rating plate (Fig. 7) of the <strong>REMS</strong> <strong>Picus</strong> <strong>S3</strong>. The first column of the table shown<br />
there covers speeds 1 to 3, the second column shows the corresponding turning<br />
speeds, the third column the core bit diameters for masonry and the fourth<br />
column contains core bit diameters for steel-reinforced concrete. It shows, for<br />
example, that a Ø 102 mm core-drilling operation in masonry should be carried<br />
out in third speed, while drilling into steel-reinforced concrete requires the use<br />
of first speed.<br />
The turning speed of <strong>REMS</strong> <strong>Picus</strong> <strong>S2</strong>/3,5 can be selected by a 2-step switching<br />
gear so that it always drills in an optimum area. The right gear can be read<br />
from the rating plate (Fig. 8) of <strong>REMS</strong> <strong>Picus</strong> <strong>S2</strong>/3,5. The table there shows<br />
gears 1 and 2 in the first column and the corresponding speeds in the second<br />
column and the drill crown diameters for masonry and steel-reinforced concrete<br />
in the third column.<br />
The rotation of the <strong>REMS</strong> <strong>Picus</strong> SR can be selected via a 2-gear stepped drive<br />
in combination with a stepless electronic speed regulation to ensure that it<br />
always operates within the optimum drilling range. The correct speed can be<br />
taken from the table (Fig. 9). The correct gear step is selected at the handle<br />
grip (39), the correct rotation via the electronic speed regulation at the dial (57).<br />
The electronic speed regulation keeps the selected speed largely constant also<br />
under load.<br />
WARNING<br />
Wait for the machine to come to a halt before engaging the transmission!<br />
Never try to do this during operation or outflow. If you cannot engage a<br />
particular speed, turn the handle grip (39) and rotate the drive spindle/diamond<br />
core drilling crown by hand at the same time. Pull out the mains plug first!<br />
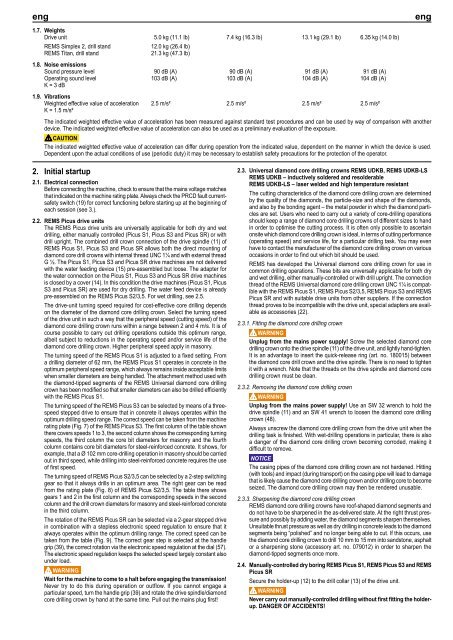
2.3. Universal diamond core drilling crowns <strong>REMS</strong> UDKB, <strong>REMS</strong> UDKB-LS<br />
<strong>REMS</strong> UDKB – inductively soldered and resolderable<br />
<strong>REMS</strong> UDKB-LS – laser welded and high temperature resistant<br />
The cutting characteristics of the diamond core drilling crown are determined<br />
by the quality of the diamonds, the particle-size and shape of the diamonds,<br />
and also by the bonding agent – the metal powder in which the diamond particles<br />
are set. Users who need to carry out a variety of core-drilling operations<br />
should keep a range of diamond core drilling crowns of different sizes to hand<br />
in order to optimise the cutting process. It is often only possible to ascertain<br />
onsite which diamond core drilling crown is ideal, in terms of cutting performance<br />
(operating speed) and service life, for a particular drilling task. You may even<br />
have to contact the manufacturer of the diamond core drilling crown on various<br />
occa sions in order to find out which bit should be used.<br />
<strong>REMS</strong> has developed the Universal diamond core drilling crown for use in<br />
common drilling operations. These bits are universally applicable for both dry<br />
and wet drilling, either manually-controlled or with drill upright. The connection<br />
thread of the <strong>REMS</strong> Universal diamond core drilling crown UNC 1¼ is compatible<br />
with the <strong>REMS</strong> <strong>Picus</strong> <strong>S1</strong>, <strong>REMS</strong> <strong>Picus</strong> <strong>S2</strong>/3,5, <strong>REMS</strong> <strong>Picus</strong> <strong>S3</strong> and <strong>REMS</strong><br />
<strong>Picus</strong> SR and with suitable drive units from other suppliers. If the connection<br />
thread proves to be incompatible with the drive unit, special adapters are available<br />
as accessories (22).<br />
2.3.1. Fitting the diamond core drilling crown<br />
WARNING<br />
Unplug from the mains power supply! Screw the selected diamond core<br />
drilling crown onto the drive spindle (11) of the drive unit, and lightly hand-tighten.<br />
It is an advantage to insert the quick-release ring (art. no. 180015) between<br />
the diamond core drill crown and the drive spindle. There is no need to tighten<br />
it with a wrench. Note that the threads on the drive spindle and diamond core<br />
drilling crown must be clean.<br />
2.3.2. Removing the diamond core drilling crown<br />
WARNING<br />
Unplug from the mains power supply! Use an SW 32 wrench to hold the<br />
drive spindle (11) and an SW 41 wrench to loosen the diamond core drilling<br />
crown (48).<br />
Always unscrew the diamond core drilling crown from the drive unit when the<br />
drilling task is finished. With wet-drilling operations in particular, there is also<br />
a danger of the diamond core drilling crown becoming corroded, making it<br />
difficult to remove.<br />
NOTICE<br />
The casing pipes of the diamond core drilling crown are not hardened. Hitting<br />
(with tools) and impact (during transport) on the casing pipe will lead to damage<br />
that is likely cause the diamond core drilling crown and/or drilling core to become<br />
seized. The diamond core drilling crown may then be rendered unusable.<br />
2.3.3. Sharpening the diamond core drilling crown<br />
<strong>REMS</strong> diamond core drilling crowns have roof-shaped diamond segments and<br />
do not have to be sharpened in the as-delivered state. At the right thrust pressure<br />
and possibly by adding water, the diamond segments sharpen themselves.<br />
Unsuitable thrust pressure as well as dry drilling in concrete leads to the diamond<br />
segments being “polished” and no longer being able to cut. If this occurs, use<br />
the diamond core drilling crown to drill 10 mm to 15 mm into sandstone, asphalt<br />
or a sharpening stone (accessory art. no. 079012) in order to sharpen the<br />
diamond-tipped segments once more.<br />
2.4. Manually-controlled dry boring <strong>REMS</strong> <strong>Picus</strong> <strong>S1</strong>, <strong>REMS</strong> <strong>Picus</strong> <strong>S3</strong> and <strong>REMS</strong><br />
<strong>Picus</strong> SR<br />
Secure the holder-up (12) to the drill collar (13) of the drive unit.<br />
WARNING<br />
Never carry out manually-controlled drilling without first fitting the holderup.<br />
DANGER OF ACCIDENTS!