Breaker Interface Module II - Eaton Canada
Breaker Interface Module II - Eaton Canada
Breaker Interface Module II - Eaton Canada
Create successful ePaper yourself
Turn your PDF publications into a flip-book with our unique Google optimized e-Paper software.
Page 26<br />
Program Settings function without retaining<br />
the setting changes. Return to Step 5 to make<br />
changes to the other submenu settings as<br />
required.<br />
Step 10: Once all the settings are set as required, use<br />
the Select and Next pushbuttons simultaneously<br />
to save and establish the new settings.<br />
When the pushbuttons are pressed and<br />
released simultaneously, Wait appears in the<br />
Function Display until the process is complete.<br />
Once complete, an Accepted or<br />
Rejected message will be displayed. The<br />
Accepted or Rejected message remains displayed<br />
until cleared by the use of any pushbutton.<br />
Once cleared, the Program Settings display<br />
appears.<br />
4-4.9 PROGRAM GROUPS MENU<br />
Viewing already programmed groups without being able<br />
to alter the group settings is made possible by the View<br />
Groups menu. This menu is discussed in detail in<br />
Paragraph 4-5 entitled “Displayed Information.” The<br />
information displayed in the View Groups menu is<br />
established by settings programmed here in the<br />
Program Groups menu.<br />
The Program Groups menu will allow the user to define<br />
up to 8 groups for energy monitoring purposes. Any<br />
energy monitoring device that is on the sub-network (i.e.<br />
OPTIM 1050, Digitrip 810/910, Magnum 1150, Energy<br />
Sentinels or Power Sentinels) can be included in one or<br />
more groups for the purpose of collective monitoring of<br />
power and energy parameters. The user can define<br />
these 8 groups by selecting which group they will be<br />
working with, then including or excluding each of the<br />
energy monitoring devices.<br />
After the groups are defined, the collective energy and<br />
power can be viewed by the user upon entering the<br />
Groups Menu entry.<br />
The Program Groups menu is Password Protected.<br />
The operator must know a valid password to proceed.<br />
The factory programmed password is 10000. This may<br />
have been altered. Refer to Paragraph 4-2.<br />
Proceed with the following steps to program or make<br />
any desired changes:<br />
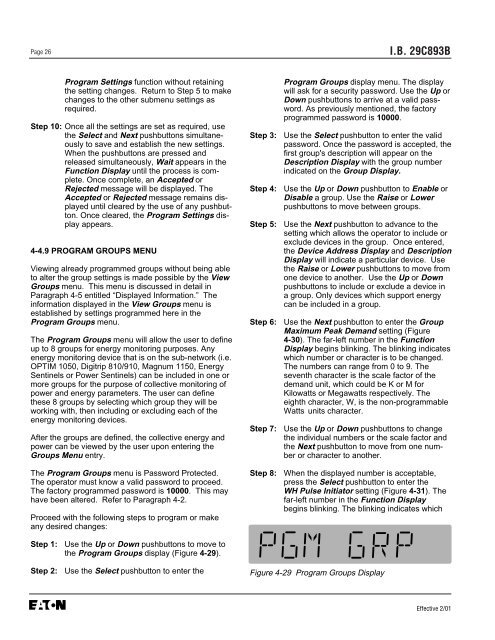
Step 1: Use the Up or Down pushbuttons to move to<br />
the Program Groups display (Figure 4-29).<br />
I.B. 29C893B<br />
Program Groups display menu. The display<br />
will ask for a security password. Use the Up or<br />
Down pushbuttons to arrive at a valid password.<br />
As previously mentioned, the factory<br />
programmed password is 10000.<br />
Step 3: Use the Select pushbutton to enter the valid<br />
password. Once the password is accepted, the<br />
first group's description will appear on the<br />
Description Display with the group number<br />
indicated on the Group Display.<br />
Step 4: Use the Up or Down pushbutton to Enable or<br />
Disable a group. Use the Raise or Lower<br />
pushbuttons to move between groups.<br />
Step 5: Use the Next pushbutton to advance to the<br />
setting which allows the operator to include or<br />
exclude devices in the group. Once entered,<br />
the Device Address Display and Description<br />
Display will indicate a particular device. Use<br />
the Raise or Lower pushbuttons to move from<br />
one device to another. Use the Up or Down<br />
pushbuttons to include or exclude a device in<br />
a group. Only devices which support energy<br />
can be included in a group.<br />
Step 6: Use the Next pushbutton to enter the Group<br />
Maximum Peak Demand setting (Figure<br />
4-30). The far-left number in the Function<br />
Display begins blinking. The blinking indicates<br />
which number or character is to be changed.<br />
The numbers can range from 0 to 9. The<br />
seventh character is the scale factor of the<br />
demand unit, which could be K or M for<br />
Kilowatts or Megawatts respectively. The<br />
eighth character, W, is the non-programmable<br />
Watts units character.<br />
Step 7: Use the Up or Down pushbuttons to change<br />
the individual numbers or the scale factor and<br />
the Next pushbutton to move from one number<br />
or character to another.<br />
Step 8: When the displayed number is acceptable,<br />
press the Select pushbutton to enter the<br />
WH Pulse Initiator setting (Figure 4-31). The<br />
far-left number in the Function Display<br />
begins blinking. The blinking indicates which<br />
Step 2: Use the Select pushbutton to enter the Figure 4-29 Program Groups Display<br />
Effective 2/01


