Download the Plane Maker Manual - X-Plane
Download the Plane Maker Manual - X-Plane
Download the Plane Maker Manual - X-Plane
You also want an ePaper? Increase the reach of your titles
YUMPU automatically turns print PDFs into web optimized ePapers that Google loves.
18 3. SHAPING THE BODY OF AN AIRCRAFT<br />
The Front/Back Tab<br />
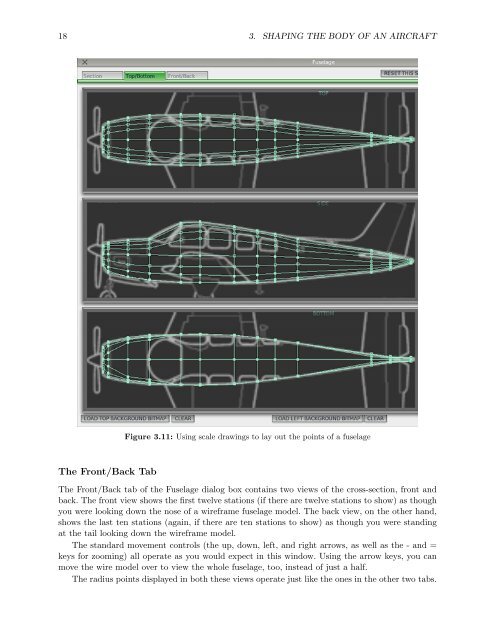
Figure 3.11: Using scale drawings to lay out <strong>the</strong> points of a fuselage<br />
The Front/Back tab of <strong>the</strong> Fuselage dialog box contains two views of <strong>the</strong> cross-section, front and<br />
back. The front view shows <strong>the</strong> first twelve stations (if <strong>the</strong>re are twelve stations to show) as though<br />
you were looking down <strong>the</strong> nose of a wireframe fuselage model. The back view, on <strong>the</strong> o<strong>the</strong>r hand,<br />
shows <strong>the</strong> last ten stations (again, if <strong>the</strong>re are ten stations to show) as though you were standing<br />
at <strong>the</strong> tail looking down <strong>the</strong> wireframe model.<br />
The standard movement controls (<strong>the</strong> up, down, left, and right arrows, as well as <strong>the</strong> - and =<br />
keys for zooming) all operate as you would expect in this window. Using <strong>the</strong> arrow keys, you can<br />
move <strong>the</strong> wire model over to view <strong>the</strong> whole fuselage, too, instead of just a half.<br />
The radius points displayed in both <strong>the</strong>se views operate just like <strong>the</strong> ones in <strong>the</strong> o<strong>the</strong>r two tabs.


