

S90 XS/S70 XS Reference Manual - zZounds.com
S90 XS/S70 XS Reference Manual - zZounds.com
S90 XS/S70 XS Reference Manual - zZounds.com

Create successful ePaper yourself
Turn your PDF publications into a flip-book with our unique Google optimized e-Paper software.
Master Mode<br />
The Master mode offers the following two features:<br />
• Up to 128 programs consisting of either a Voice, a Performance, or a Multi can be created, stored and called up.<br />
• For each Master program, four independent keyboard Zones can be set.<br />
You can use the Master mode to memorize the settings you use most often including the information which mode is<br />
used, and call them up instantly anytime you need them with a single button press. Furthermore, you can memorize the<br />
settings for controlling external MIDI devices to the Master, resulting that you can change external MIDI tone generators<br />
connected to this instrument in sequence while performing on the live stage.<br />
Master Play<br />
To enter the Master Play mode and call up the Master Play display, press the [MASTER] button from the current mode.<br />
Operation Press the [MASTER] button<br />
Selecting a Master Program<br />
The <strong>S90</strong> <strong>XS</strong>/<strong>S70</strong> <strong>XS</strong> features 128 specially programmed Masters, stored to internal User Memory. The Bank consists of<br />
eight Groups (A to H), each of which contains 16 Master programs. Selecting a Master is done in basically the same<br />
way as selecting Voices. To call up the desired Master program, select the appropriate Group and Number.<br />
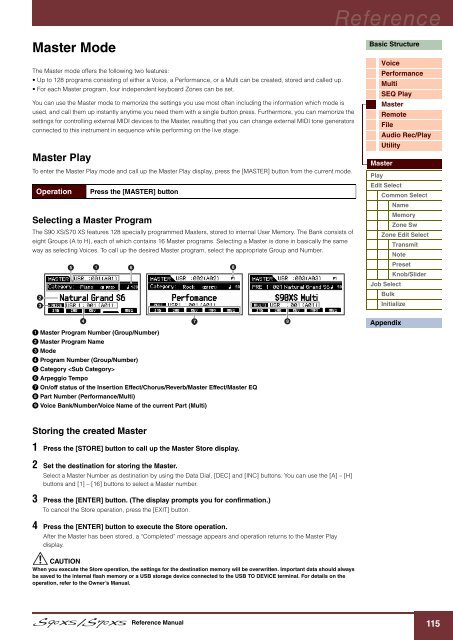
1 Master Program Number (Group/Number)<br />
2 Master Program Name<br />
3 Mode<br />
4 Program Number (Group/Number)<br />
5 Category <br />
6 Arpeggio Tempo<br />
7 On/off status of the Insertion Effect/Chorus/Reverb/Master Effect/Master EQ<br />
8 Part Number (Performance/Multi)<br />
9 Voice Bank/Number/Voice Name of the current Part (Multi)<br />
Storing the created Master<br />
1 Press the [STORE] button to call up the Master Store display.<br />
2 Set the destination for storing the Master.<br />
Select a Master Number as destination by using the Data Dial, [DEC] and [INC] buttons. You can use the [A] – [H]<br />
buttons and [1] – [16] buttons to select a Master number.<br />
3 Press the [ENTER] button. (The display prompts you for confirmation.)<br />
To cancel the Store operation, press the [EXIT] button.<br />
4 Press the [ENTER] button to execute the Store operation.<br />
After the Master has been stored, a “Completed” message appears and operation returns to the Master Play<br />
display.<br />
CAUTION<br />
When you execute the Store operation, the settings for the destination memory will be overwritten. Important data should always<br />
be saved to the internal flash memory or a USB storage device connected to the USB TO DEVICE terminal. For details on the<br />
operation, refer to the Owner’s <strong>Manual</strong>.<br />
<strong>Reference</strong> <strong>Manual</strong><br />
<strong>Reference</strong><br />
Basic Structure<br />
Voice<br />
Performance<br />
Multi<br />
SEQ Play<br />
Master<br />
Remote<br />
File<br />
Audio Rec/Play<br />
Utility<br />
Master<br />
Play<br />
Edit Select<br />
Common Select<br />
Name<br />
Memory<br />
Zone Sw<br />
Zone Edit Select<br />
Transmit<br />
Note<br />
Preset<br />
Knob/Slider<br />
Job Select<br />
Bulk<br />
Initialize<br />
Appendix<br />
115


