

LilyPond Beginnershandleiding
LilyPond Beginnershandleiding
LilyPond Beginnershandleiding

You also want an ePaper? Increase the reach of your titles
YUMPU automatically turns print PDFs into web optimized ePapers that Google loves.
Hoofdstuk 4: Tweaking output 103<br />
}<br />
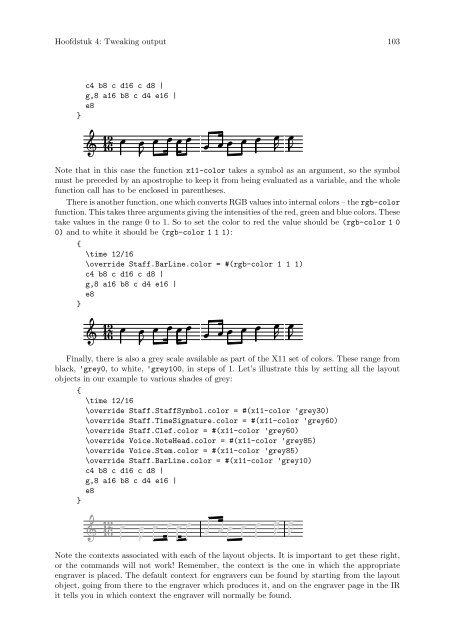
c4 b8 c d16 c d8 |<br />
g,8 a16 b8 c d4 e16 |<br />
e8<br />
12 <br />
16 <br />
<br />
<br />
<br />
<br />
Note that in this case the function x11-color takes a symbol as an argument, so the symbol<br />
must be preceded by an apostrophe to keep it from being evaluated as a variable, and the whole<br />
function call has to be enclosed in parentheses.<br />
There is another function, one which converts RGB values into internal colors – the rgb-color<br />
function. This takes three arguments giving the intensities of the red, green and blue colors. These<br />
take values in the range 0 to 1. So to set the color to red the value should be (rgb-color 1 0<br />
0) and to white it should be (rgb-color 1 1 1):<br />
{<br />
\time 12/16<br />
\override Staff.BarLine.color = #(rgb-color 1 1 1)<br />
c4 b8 c d16 c d8 |<br />
g,8 a16 b8 c d4 e16 |<br />
e8<br />
}<br />
12 <br />
16 <br />
<br />
<br />
<br />
<br />
Finally, there is also a grey scale available as part of the X11 set of colors. These range from<br />
black, 'grey0, to white, 'grey100, in steps of 1. Let’s illustrate this by setting all the layout<br />
objects in our example to various shades of grey:<br />
{<br />
\time 12/16<br />
\override Staff.StaffSymbol.color = #(x11-color 'grey30)<br />
\override Staff.TimeSignature.color = #(x11-color 'grey60)<br />
\override Staff.Clef.color = #(x11-color 'grey60)<br />
\override Voice.NoteHead.color = #(x11-color 'grey85)<br />
\override Voice.Stem.color = #(x11-color 'grey85)<br />
\override Staff.BarLine.color = #(x11-color 'grey10)<br />
c4 b8 c d16 c d8 |<br />
g,8 a16 b8 c d4 e16 |<br />
e8<br />
}<br />
12 <br />
16 <br />
<br />
<br />
<br />
<br />
Note the contexts associated with each of the layout objects. It is important to get these right,<br />
or the commands will not work! Remember, the context is the one in which the appropriate<br />
engraver is placed. The default context for engravers can be found by starting from the layout<br />
object, going from there to the engraver which produces it, and on the engraver page in the IR<br />
it tells you in which context the engraver will normally be found.
