

LilyPond Beginnershandleiding
LilyPond Beginnershandleiding
LilyPond Beginnershandleiding

Create successful ePaper yourself
Turn your PDF publications into a flip-book with our unique Google optimized e-Paper software.
Hoofdstuk 4: Tweaking output 105<br />
<br />
<br />
<br />
<br />
<br />
<br />
<br />
<br />
<br />
<br />
<br />
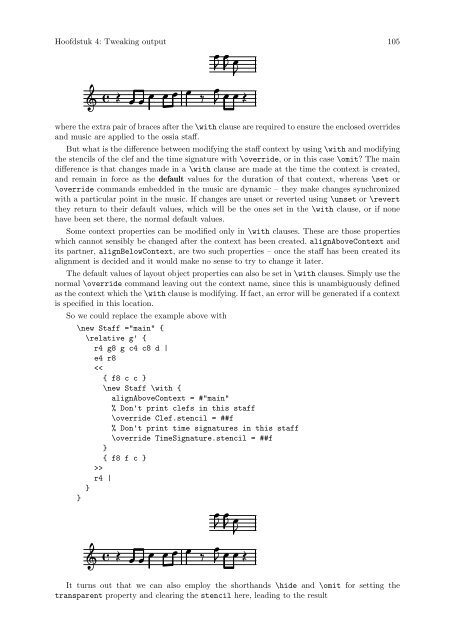
where the extra pair of braces after the \with clause are required to ensure the enclosed overrides<br />
and music are applied to the ossia staff.<br />
But what is the difference between modifying the staff context by using \with and modifying<br />
the stencils of the clef and the time signature with \override, or in this case \omit? The main<br />
difference is that changes made in a \with clause are made at the time the context is created,<br />
and remain in force as the default values for the duration of that context, whereas \set or<br />
\override commands embedded in the music are dynamic – they make changes synchronized<br />
with a particular point in the music. If changes are unset or reverted using \unset or \revert<br />
they return to their default values, which will be the ones set in the \with clause, or if none<br />
have been set there, the normal default values.<br />
Some context properties can be modified only in \with clauses. These are those properties<br />
which cannot sensibly be changed after the context has been created. alignAboveContext and<br />
its partner, alignBelowContext, are two such properties – once the staff has been created its<br />
alignment is decided and it would make no sense to try to change it later.<br />
The default values of layout object properties can also be set in \with clauses. Simply use the<br />
normal \override command leaving out the context name, since this is unambiguously defined<br />
as the context which the \with clause is modifying. If fact, an error will be generated if a context<br />
is specified in this location.<br />
So we could replace the example above with<br />
\new Staff ="main" {<br />
\relative g' {<br />
r4 g8 g c4 c8 d |<br />
e4 r8<br />
><br />
r4 |<br />
}<br />
}<br />
<br />
<br />
<br />
<br />
<br />
<br />
<br />
<br />
<br />
<br />
<br />
It turns out that we can also employ the shorthands \hide and \omit for setting the<br />
transparent property and clearing the stencil here, leading to the result
