

LilyPond Beginnershandleiding
LilyPond Beginnershandleiding
LilyPond Beginnershandleiding

You also want an ePaper? Increase the reach of your titles
YUMPU automatically turns print PDFs into web optimized ePapers that Google loves.
Hoofdstuk 4: Tweaking output 94<br />
link to All layout objects. The page that appears lists all the layout objects used in your version<br />
of <strong>LilyPond</strong>, in alphabetic order. Select the link to Slur, and the properties of Slurs are listed.<br />
An alternative way of finding this page is from the Notation Reference. On one of the pages<br />
that deals with slurs you may find a link to the Internals Reference. This link will take you<br />
directly to this page, but if you have an idea about the name of the layout object to be tweaked,<br />
it is easier to go straight to the IR and search there.<br />
This Slur page in the IR tells us first that Slur objects are created by the Slur engraver. Then<br />
it lists the standard settings. Browse through them looking for a property that might control<br />
the heaviness of slurs, and you should find<br />
thickness (number)<br />
1.2<br />
Line thickness, generally measured in line-thickness<br />
This looks a good bet to change the heaviness. It tells us that the value of thickness is a<br />
simple number, that the default value is 1.2, and that the units are in another property called<br />
line-thickness.<br />
As we said earlier, there are few to no explanations in the IR, but we already have enough<br />
information to try changing the slur thickness. We see that the name of the layout object is<br />
Slur, that the name of the property to change is thickness and that the new value should be<br />
a number somewhat larger than 1.2 if we are to make slurs thicker.<br />
We can now construct the \override command by simply substituting the values we have<br />
found for the names, omitting the context. Let’s use a very large value for the thickness at first,<br />
so we can be sure the command is working. We get:<br />
\override Slur.thickness = #5.0<br />
Don’t forget the # preceding the new value!<br />
The final question is, ‘Where should this command be placed?’ While you are unsure and<br />
learning, the best answer is, ‘Within the music, before the first slur and close to it.’ Let’s do<br />
that:<br />
{<br />
}<br />
\key es \major<br />
\time 6/8<br />
{<br />
% Increase thickness of all following slurs from 1.2 to 5.0<br />
\override Slur.thickness = #5.0<br />
r4 bes8 bes[( g]) g |<br />
g8[( es]) es d[( f]) as |<br />
as8 g<br />
}<br />
\addlyrics {<br />
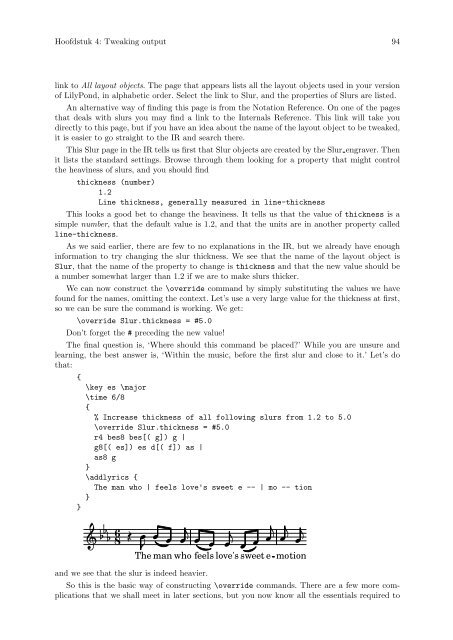
The man who | feels love's sweet e -- | mo -- tion<br />
}<br />
8<br />
6<br />
<br />
<br />
<br />
<br />
sweet<br />
The<br />
love's e<br />
<br />
man who feels<br />
and we see that the slur is indeed heavier.<br />
<br />
<br />
motion<br />
So this is the basic way of constructing \override commands. There are a few more complications<br />
that we shall meet in later sections, but you now know all the essentials required to
