- Page 1:
OFFICEJET 6500 User Guide E709
- Page 4 and 5:
Copyright information © 2009 Copyr
- Page 6 and 7:
Print on both sides (duplexing)....
- Page 8 and 9:
Set the copy paper size............
- Page 10 and 11:
9 Maintain and troubleshoot Work wi
- Page 12 and 13:
Troubleshoot installation issues...
- Page 14 and 15:
Regulatory information for wireless
- Page 16 and 17:
Chapter 1 (continued) Resource Desc
- Page 18 and 19:
Chapter 1 Front view 1 Automatic do
- Page 20 and 21:
Chapter 1 Label Name and Descriptio
- Page 22 and 23:
Chapter 1 (continued) Description R
- Page 24 and 25:
Chapter 2 Selecting the paper siz
- Page 26 and 27:
Chapter 2 To change settings from t
- Page 28 and 29:
Chapter 2 installed. The HP Solutio
- Page 30 and 31:
Chapter 2 NOTE: To make a copy usin
- Page 32 and 33:
Chapter 2 (continued) HP Premium Pr
- Page 34 and 35:
Chapter 2 Transparencies • Insert
- Page 36 and 37:
Chapter 2 (continued) Media size In
- Page 38 and 39:
Chapter 2 (continued) Tray Type Wei
- Page 40 and 41:
Chapter 2 4. Pull out the extension
- Page 42 and 43:
Chapter 2 To print a borderless doc
- Page 44 and 45:
3 Print This section contains the f
- Page 46 and 47:
Chapter 3 To print automatically on
- Page 48 and 49:
4 Scan You can scan originals and s
- Page 50 and 51:
Chapter 4 Scan from a TWAIN-complia
- Page 52 and 53:
5 Work with memory devices The devi
- Page 54 and 55:
Chapter 5 To print camera-selected
- Page 56 and 57:
Chapter 5 To turn on Red Eye Remova
- Page 58 and 59:
Chapter 6 • Change the fax resolu
- Page 60 and 61:
Chapter 6 3. When you hear the dial
- Page 62 and 63:
Chapter 6 Send a fax to multiple re
- Page 64 and 65:
Chapter 6 The following resolution
- Page 66 and 67:
Chapter 6 If you receive a legal-si
- Page 68 and 69:
Chapter 6 3. Press the right arrow
- Page 70 and 71:
Chapter 6 To set the paper size for
- Page 72 and 73:
Chapter 6 Remove numbers from the j
- Page 74 and 75:
Chapter 6 Modify Fax to PC or Fax t
- Page 76 and 77:
Chapter 6 To set the answer mode to
- Page 78 and 79:
Chapter 6 To set the dial type via
- Page 80 and 81:
Chapter 6 This section contains the
- Page 82 and 83: Chapter 6 that contains the number
- Page 84 and 85: Chapter 6 By default, the device is
- Page 86 and 87: Chapter 6 To view the fax log from
- Page 88 and 89: 7 Copy You can produce high-quality
- Page 90 and 91: Chapter 7 Set the copy paper size Y
- Page 92 and 93: Chapter 7 4. Press until Full Page
- Page 94 and 95: Chapter 7 To collate copies from th
- Page 96 and 97: 8 Configure and manage This section
- Page 98 and 99: Chapter 8 (continued) Use this tool
- Page 100 and 101: Chapter 8 Toolbox tabs The Toolbox
- Page 102 and 103: Chapter 8 cookie that stores custom
- Page 104 and 105: Chapter 8 • Clean: Guides you thr
- Page 106 and 107: Chapter 8 help troubleshoot network
- Page 108 and 109: Chapter 8 Set link speed You can ch
- Page 110 and 111: Chapter 8 Countries/regions with a
- Page 112 and 113: Chapter 8 (continued) Other equipme
- Page 114 and 115: Chapter 8 To set up the device with
- Page 116 and 117: Chapter 8 3. Change the Distinctive
- Page 118 and 119: Chapter 8 Figure 8-5 Back view of t
- Page 120 and 121: Chapter 8 4. If your modem software
- Page 122 and 123: Chapter 8 There are two different w
- Page 124 and 125: Chapter 8 Shared voice/fax with com
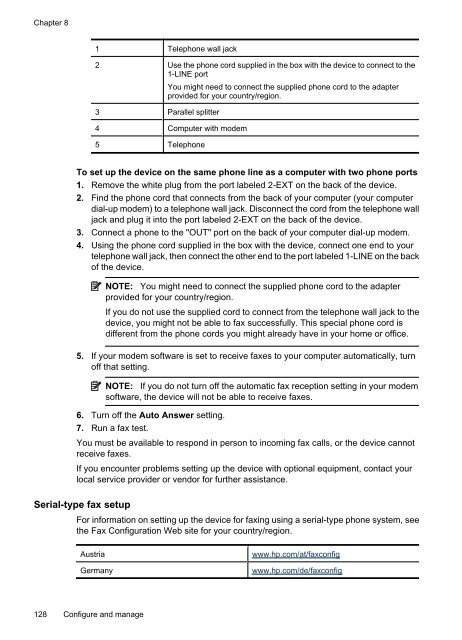
- Page 126 and 127: Chapter 8 1 Telephone wall jack 2 U
- Page 128 and 129: Chapter 8 5 Answering machine 6 Com
- Page 130 and 131: Chapter 8 NOTE: You will need to pu
- Page 134 and 135: Chapter 8 setup experience. However
- Page 136 and 137: Chapter 8 Choose the installation o
- Page 138 and 139: Chapter 8 groups or when usage is l
- Page 140 and 141: Chapter 8 There are two communicati
- Page 142 and 143: Chapter 8 Connect the device using
- Page 144 and 145: Chapter 8 4. Follow the onscreen in
- Page 146 and 147: Chapter 8 4. Restart your computer.
- Page 148 and 149: Chapter 9 Information on ink cartri
- Page 150 and 151: Chapter 9 3. Press the tab on the f
- Page 152 and 153: Chapter 9 Clean the sensor NOTE: Th
- Page 154 and 155: Chapter 9 The print carriage moves
- Page 156 and 157: Chapter 9 3. In the Print Settings
- Page 158 and 159: Chapter 9 NOTE: If you turn off the
- Page 160 and 161: Chapter 9 Item Cartridge color 4 Ye
- Page 162 and 163: Chapter 9 If the color of any of th
- Page 164 and 165: Chapter 9 3. Clean the glass by usi
- Page 166 and 167: Chapter 9 To clean the glass strip
- Page 168 and 169: Chapter 9 • Power cord and other
- Page 170 and 171: Chapter 9 Check the media settings
- Page 172 and 173: Chapter 9 Envelopes print incorrect
- Page 174 and 175: Chapter 9 If this did not solve the
- Page 176 and 177: Chapter 9 Cause: The document was c
- Page 178 and 179: Chapter 9 Solution 7: Clear the pap
- Page 180 and 181: Chapter 9 Solution 3: Load the stac
- Page 182 and 183:
Chapter 9 A blank page came out whi
- Page 184 and 185:
Chapter 9 Solution 1: Make sure you
- Page 186 and 187:
Chapter 9 Aligning the printer can
- Page 188 and 189:
Chapter 9 Always make sure the pape
- Page 190 and 191:
Chapter 9 • Solution 3: Check the
- Page 192 and 193:
Chapter 9 Solution 2: Check the pap
- Page 194 and 195:
Chapter 9 Solution 3: Print the ima
- Page 196 and 197:
Chapter 9 Solution 2: Wait while th
- Page 198 and 199:
Chapter 9 Cause: Many black print q
- Page 200 and 201:
Chapter 9 Media is not picked up fr
- Page 202 and 203:
Chapter 9 Copies are blank • Chec
- Page 204 and 205:
Chapter 9 • Part of the document
- Page 206 and 207:
Chapter 9 Error messages appear •
- Page 208 and 209:
Chapter 9 Try these first if you ar
- Page 210 and 211:
Chapter 9 The "Phone Cord Connected
- Page 212 and 213:
Chapter 9 The "Dial Tone Detection"
- Page 214 and 215:
Chapter 9 You might need to connect
- Page 216 and 217:
Chapter 9 • If the device shares
- Page 218 and 219:
Chapter 9 Disconnect the answerin
- Page 220 and 221:
Chapter 9 Cause: The computer selec
- Page 222 and 223:
Chapter 9 Basic wireless troublesho
- Page 224 and 225:
Chapter 9 If you are unable to get
- Page 226 and 227:
Chapter 9 Mac OS X 1. Click System
- Page 228 and 229:
Chapter 9 Inspect the ends of the
- Page 230 and 231:
Chapter 9 Check the device to ensur
- Page 232 and 233:
Chapter 9 b. Locate any jammed medi
- Page 234 and 235:
Chapter 9 • Fax Memory Full • D
- Page 236 and 237:
Chapter 9 5. Remove the printhead b
- Page 238 and 239:
Chapter 9 d. Wipe the previously cl
- Page 240 and 241:
Chapter 9 HP recommends you have a
- Page 242 and 243:
Chapter 9 The cartridge cradle cann
- Page 244 and 245:
Chapter 9 Sensor issue Sensor failu
- Page 246 and 247:
A HP supplies and accessories This
- Page 248 and 249:
B Support and warranty The informat
- Page 250 and 251:
Appendix B Ink cartridge warranty i
- Page 252 and 253:
Appendix B 5. Obtain the version nu
- Page 254 and 255:
Appendix B Placing a call Call HP s
- Page 256 and 257:
Appendix B Prepare the device for s
- Page 258 and 259:
Appendix B 4. Retain the control-pa
- Page 260 and 261:
C Device specifications For media a
- Page 262 and 263:
Appendix C Recommended requirements
- Page 264 and 265:
Appendix C • Confirmation and act
- Page 266 and 267:
D Regulatory information The device
- Page 268 and 269:
Appendix D Notice to users in Japan
- Page 270 and 271:
Appendix D Notice to users of the C
- Page 272 and 273:
Appendix D Exposure to radio freque
- Page 274 and 275:
Appendix D All-in-One) . This regul
- Page 276 and 277:
Appendix D DECLARATION OF CONFORMIT
- Page 278 and 279:
Appendix D Disposal of waste equipm
- Page 280 and 281:
Appendix D Third-party licenses Exp
- Page 282 and 283:
Appendix D 3. All advertising mater
- Page 284 and 285:
Index Symbols/Numerics (ADF) automa
- Page 286 and 287:
(parallel phone systems) 123 answer
- Page 288 and 289:
(parallel phone systems) 123 shared
- Page 290 and 291:
serial phone systems countries/regi
- Page 292:
white bands or stripes, troubleshoo