X9DR3_i-LN4F+ 1.1.indb - Supermicro
X9DR3_i-LN4F+ 1.1.indb - Supermicro
X9DR3_i-LN4F+ 1.1.indb - Supermicro

Create successful ePaper yourself
Turn your PDF publications into a flip-book with our unique Google optimized e-Paper software.
Chapter 2: Installation<br />
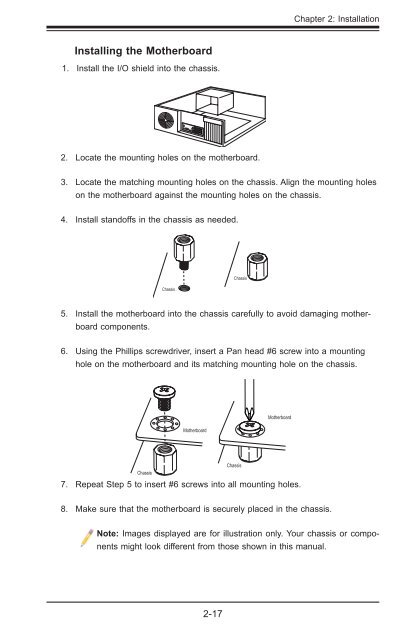
Installing the Motherboard<br />
1. Install the I/O shield into the chassis.<br />
2. Locate the mounting holes on the motherboard.<br />
3. Locate the matching mounting holes on the chassis. Align the mounting holes<br />
on the motherboard against the mounting holes on the chassis.<br />
4. Install standoffs in the chassis as needed.<br />
5. Install the motherboard into the chassis carefully to avoid damaging motherboard<br />
components.<br />
6. Using the Phillips screwdriver, insert a Pan head #6 screw into a mounting<br />
hole on the motherboard and its matching mounting hole on the chassis.<br />
7. Repeat Step 5 to insert #6 screws into all mounting holes.<br />
8. Make sure that the motherboard is securely placed in the chassis.<br />
Note: Images displayed are for illustration only. Your chassis or components<br />
might look different from those shown in this manual.<br />
2-17