

StoreFront 5.0 Manual - StoreFront Support - LaGarde, Inc.
StoreFront 5.0 Manual - StoreFront Support - LaGarde, Inc.
StoreFront 5.0 Manual - StoreFront Support - LaGarde, Inc.

Create successful ePaper yourself
Turn your PDF publications into a flip-book with our unique Google optimized e-Paper software.
<strong>StoreFront</strong> <strong>5.0</strong><br />
USING AN INDIVIDUAL SSL CERTIFICATE<br />
Although most hosts offer shared SSL resources, you can also purchase your own SSL<br />
certificate from a company such as Thawte or Verisign. This is simplest and, over time, the<br />
most economical form of SSL security. <strong>StoreFront</strong> <strong>Support</strong> strongly recommends that you<br />
purchase your own SSLS certificate. You should contact your host to determine their preference<br />
and to coordinate the process of obtaining the certificate.<br />
Once the SSL certificate has been obtained, your host can apply it to your site. The SSL<br />
protocol will become available on your entire domain. Follow the instructions below to configure<br />
your site to use an individual SSL certificate.<br />
1. Connect to your database using the Store Builder. If you are unsure of how to do<br />
this, please refer to Connecting to a Remote or Local Database, page 21, for further<br />
instructions.<br />
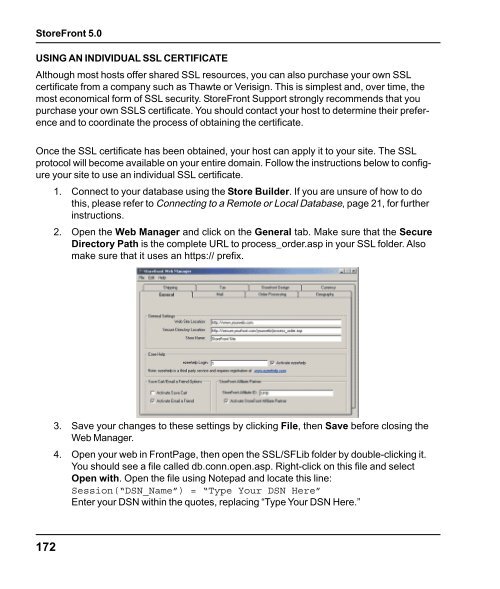
2. Open the Web Manager and click on the General tab. Make sure that the Secure<br />
Directory Path is the complete URL to process_order.asp in your SSL folder. Also<br />
make sure that it uses an https:// prefix.<br />
3. Save your changes to these settings by clicking File, then Save before closing the<br />
Web Manager.<br />
4. Open your web in FrontPage, then open the SSL/SFLib folder by double-clicking it.<br />
You should see a file called db.conn.open.asp. Right-click on this file and select<br />
Open with. Open the file using Notepad and locate this line:<br />
Session(“DSN_Name”) = “Type Your DSN Here”<br />
Enter your DSN within the quotes, replacing “Type Your DSN Here.”<br />
172
