Samsung SRN-1000 Network Video Recorder User Manual - Use-IP
Samsung SRN-1000 Network Video Recorder User Manual - Use-IP
Samsung SRN-1000 Network Video Recorder User Manual - Use-IP

You also want an ePaper? Increase the reach of your titles
YUMPU automatically turns print PDFs into web optimized ePapers that Google loves.
appendix<br />
94_ appendix<br />
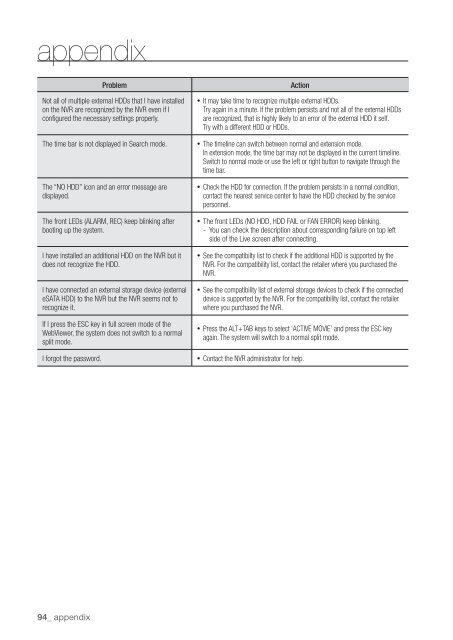
Problem Action<br />
Not all of multiple external HDDs that I have installed<br />
on the NVR are recognized by the NVR even if I<br />
configured the necessary settings properly.<br />
The time bar is not displayed in Search mode.<br />
The “NO HDD” icon and an error message are<br />
displayed.<br />
The front LEDs (ALARM, REC) keep blinking after<br />
booting up the system.<br />
I have installed an additional HDD on the NVR but it<br />
does not recognize the HDD.<br />
I have connected an external storage device (external<br />
eSATA HDD) to the NVR but the NVR seems not to<br />
recognize it.<br />
If I press the ESC key in full screen mode of the<br />
WebViewer, the system does not switch to a normal<br />
split mode.<br />
I forgot the password.<br />
It may take time to recognize multiple external HDDs.<br />
Try again in a minute. If the problem persists and not all of the external HDDs<br />
are recognized, that is highly likely to an error of the external HDD it self.<br />
Try with a different HDD or HDDs.<br />
The timeline can switch between normal and extension mode.<br />
In extension mode, the time bar may not be displayed in the current timeline.<br />
Switch to normal mode or use the left or right button to navigate through the<br />
time bar.<br />
Check the HDD for connection. If the problem persists in a normal condition,<br />
contact the nearest service center to have the HDD checked by the service<br />
personnel.<br />
The front LEDs (NO HDD, HDD FAIL or FAN ERROR) keep blinking.<br />
- You can check the description about corresponding failure on top left<br />
side of the Live screen after connecting.<br />
See the compatibilty list to check if the additional HDD is supported by the<br />
NVR. For the compatibility list, contact the retailer where you purchased the<br />
NVR.<br />
See the compatibility list of external storage devices to check if the connected<br />
device is supported by the NVR. For the compatibility list, contact the retailer<br />
where you purchased the NVR.<br />
Press the ALT+TAB keys to select ‘ACTIVE MOVIE’ and press the ESC key<br />
again. The system will switch to a normal split mode.<br />
Contact the NVR administrator for help.