Urma Digiset 5 USERMANUAL - Urma AG
Urma Digiset 5 USERMANUAL - Urma AG
Urma Digiset 5 USERMANUAL - Urma AG

Create successful ePaper yourself
Turn your PDF publications into a flip-book with our unique Google optimized e-Paper software.
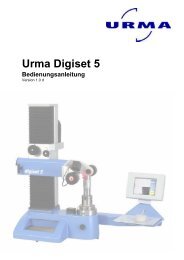
digiset 5<br />
8.2 Measuring methods<br />
8.2.1 Fixed axis<br />
Here all measurements relate to the original cross hair co-ordinates.<br />
You access this operating mode using the following menu steps:<br />
Main menu Sub-menu 1<br />
Imaging � Fixed axis<br />
After selection the system analyses the object contour and automatically suggests a<br />
measuring procedure for carrying out measurements immediately. The measuring<br />
procedure used is displayed in the status window at the same time. If an alternative<br />
measuring procedure is required it is possible to enter the measuring procedure manually<br />
by pressing the button in the status window.<br />
Procedure:<br />
�<br />
6. Move the object into the camera’s visual range.<br />
7. Roughly set the picture focus by turning the object on its support to its<br />
maximum deviation.<br />
8. As soon as the object to be measured is within the focussing area, the adjustment<br />
bars are displayed. The TCAM2 automatically determines the best<br />
measuring procedure and the test LED goes green.<br />
9. Move the edge of the object as close as possible to the cross hairs so that<br />
the arrow of the adjustment bar corresponding to the deviation direction is in<br />
the green area.<br />
10. The focus is finely adjusted by once again turning the object in the direction<br />
of the focus level until the arrow shows the maximum deviation in the corresponding<br />
adjustment bar.<br />
11. If the TCAM2 does not set the measuring procedure or the analysis window<br />
to your requirements, change this manually.<br />
The analysis window should always be around the co-ordinate origin point.<br />
12. Align the contour on the measuring lines. Note the adjustment bars that give<br />
you optimum support for this.<br />
13. If the adjustment bar pointers are in the middle you have found the best<br />
possible position for the object. You can now further process the data and<br />
start measuring again.<br />
<strong>Urma</strong> <strong>AG</strong>, Switzerland www.urma.ch page 42