User Manual
User Manual
User Manual

Create successful ePaper yourself
Turn your PDF publications into a flip-book with our unique Google optimized e-Paper software.
Removing and reinstalling the foot stands<br />
Attention:<br />
Do not open your computer or attempt any repair before reading and understanding the “Important safety information”<br />
on page v.<br />
Note: When a wall mount is used, foot stands can be removed and reinstalled for your preference.<br />
This section provides instructions on how to remove and reinstall the foot stands.<br />
CAUTION:<br />
Turn off the computer and wait three to five minutes to let the computer cool before removing the<br />
foot stands.<br />
To remove and reinstall the foot stands, do the following:<br />
1. Remove any media from the drives and turn off all attached devices and the computer.<br />
2. Disconnect all power cords from electrical outlets.<br />
3. Disconnect the power cords, Input/Output cables, and any other cables that are connected to the<br />
computer. See “Locating connectors, controls, and indicators on the front of your computer” on page 9<br />
and “Locating connectors on the rear of your computer” on page 10.<br />
4. Place a soft, clean towel or cloth on the desk or the surface. Hold the sides of your computer and gently<br />
lay it down so that the screen is against the surface and the cover is facing up.<br />
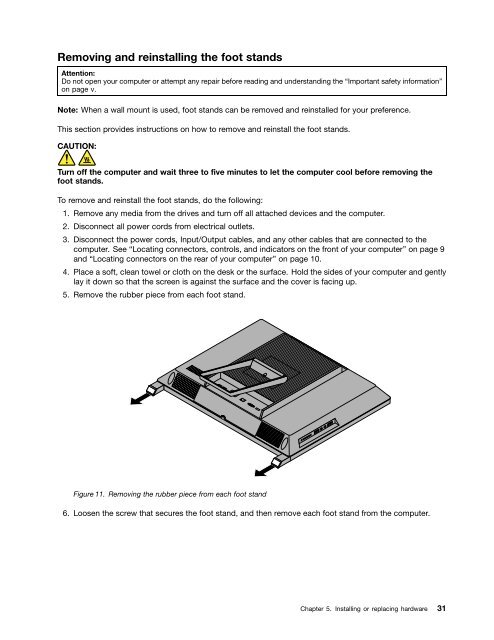
5. Remove the rubber piece from each foot stand.<br />
Figure 11. Removing the rubber piece from each foot stand<br />
6. Loosen the screw that secures the foot stand, and then remove each foot stand from the computer.<br />
Chapter 5. Installing or replacing hardware 31