You also want an ePaper? Increase the reach of your titles
YUMPU automatically turns print PDFs into web optimized ePapers that Google loves.
c. Select A4:I12.<br />
d. Click the Format button [Home tab, Cells group] and select AutoFit Column Width.<br />
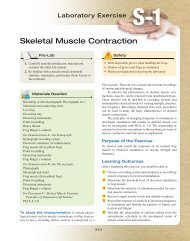
9. Save your workbook (Figure 1-104).<br />
10. Edit a cell.<br />
a. Double-click cell B7 to activate edit<br />
mode.<br />
b. Edit the cell’s contents so it appears<br />
as Pink.<br />
11. Change the width of a column.<br />
a. Click column heading A to select the<br />
1-104 Formatted worksheet<br />
column.<br />
b. Click the Format button [Home tab, Cells group] and select Column Width.<br />
c. Enter 24.0 as the new width and click OK.<br />
12. Apply a new row height.<br />
a. Right-click row heading 4.<br />
b. Choose Row Height from the context menu.<br />
c. Enter 21.0 as the new height and click OK.<br />
13. Insert a new column and type a column heading and data in the new column.<br />
a. Right-click column heading D.<br />
b. Choose Insert from the context menu to add a new column.<br />
c. Select cell D4 and type: Discontinue.<br />
d. Increase the width of the new column if needed to automatically fit the contents of the column.<br />
e. Enter the following information into the cell range D5:D12:<br />
D<br />
5 No<br />
6 No<br />
7 No<br />
8 No<br />
9 No<br />
10 Yes<br />
11 No<br />
12 Yes<br />
14. Rename and color the sheet tab.<br />
a. Double-click the Sheet1 tab.<br />
b. Type the following name: Northern Warehouse and press Enter.<br />
c. Click the Format button [Home tab, Cells group].<br />
d. Select Tab Color in the Organize Sheets category to add a fill color to the background of the sheet tab.<br />
e. Select Dark Red, Accent 1, Darker 50% (last color in the fifth Theme Color column).<br />
15. Click the Save button on the Quick Access toolbar to save the workbook changes.<br />
16. Move cell contents and adjust column width.<br />
a. Select the cell range D4:D12.<br />
b. Click the Cut button [Home tab, Clipboard group].<br />
E1-66<br />
<strong>Excel</strong> 2013 <strong>Chapter</strong> 1 Creating and Editing Workbooks