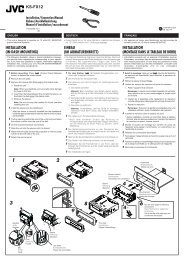
GR-DVL9600 GR-DVL9500 - JVC
GR-DVL9600 GR-DVL9500 - JVC
GR-DVL9600 GR-DVL9500 - JVC

You also want an ePaper? Increase the reach of your titles
YUMPU automatically turns print PDFs into web optimized ePapers that Google loves.
SYMPTOM POSSIBLE CAUSES CORRECTIVE ACTION<br />
12. Although Pro Snapshot is<br />
taken with the flash, Red-Eye<br />
Reduction does not take place.<br />
13. The image taken using Pro<br />
Snapshot is too dark.<br />
12. • The subject does not look<br />
straight toward the flash.<br />
• The subject does not look at the<br />
first flash, which is an important<br />
part of Red-Eye Reduction.<br />
• The camcorder is too far from<br />
the subject.<br />
• The flash is not in Red-Eye<br />
Reduction mode.<br />
13. • “FLASH” is set to “OFF” in the<br />
Recording Menu.<br />
• The flash emission window is<br />
covered by fingers, etc..<br />
• The flash brightness is set to<br />
produce a darker image<br />
(adjustment value: –3).<br />
• The camcorder is too far from<br />
the subject.<br />
EN67<br />
12. • The subject should look straight<br />
toward the flash, especially the<br />
first flash. If the subject does not<br />
see the first flash, it will be<br />
difficult for Red-Eye Reduction<br />
to take place ( pg. 26).<br />
• The flash is effective for<br />
subjects at a distance of approx.<br />
0.7 m to 2 m from the<br />
camcorder ( pg. 26).<br />
• Press the Red-Eye Reduction<br />
Button ( /3) to display the<br />
Red-Eye Reduction indicator<br />
( pg. 26).<br />
13. • Set “FLASH” to “AUTO” or<br />
“ON” in the Recording Menu<br />
( pg. 26).<br />
• Do not cover the flash emission<br />
window.<br />
• Adjust the flash brightness to a<br />
larger value ( pg. 27).<br />
• The flash is effective for<br />
subjects at a distance of approx.<br />
0.7 m to 2 m ( pg. 26).<br />
14. The image taken using Pro<br />
Snapshot is too bright.<br />
15. The colour of Pro Snapshot<br />
looks strange.<br />
16. Digital Zoom does not work.<br />
17. Programme AE with special<br />
effects and Fade/Wipe Effects<br />
do not work.<br />
18. The Black & White Fader does<br />
not work.<br />
19. The Dissolve function does not<br />
work.<br />
14. • “FLASH” is set to “ON” in the<br />
Recording Menu.<br />
15. • The light source or the subject<br />
does not include white. Or there<br />
are various different light<br />
sources behind the subject.<br />
16. • 10X optical zoom is selected.<br />
• The Video Echo mode is<br />
activated.<br />
• Picture Wipe or Dissolve are<br />
being used in a scene transition.<br />
• 5-Second recording was<br />
done with the Power Switch<br />
set to “5S”, and with “5SD”<br />
selected in the System Menu.<br />
• Pro Snapshot was attempted<br />
during Digital Zoom.<br />
• High Speed Recording is<br />
attempted.<br />
17. • The Power Switch is set to “ ”<br />
or “5S” .<br />
• Some functions are disabled<br />
during High Speed Recording.<br />
18. • The Sepia or Monotone mode is<br />
activated.<br />
19. • The Sepia, Monotone or Slow<br />
Shutter mode of Programme AE<br />
with special effects is activated.<br />
• The Squeeze mode is selected.<br />
• The previously selected mode of<br />
Programme AE with special<br />
effects was changed after the<br />
last selected scene for editing<br />
was registered.<br />
14. • Set “FLASH” to any parameter<br />
other than “ON” in the<br />
Recording Menu ( pg. 26).<br />
15. • Set “FLASH” to “ON” in the<br />
Recording Menu. Or find a<br />
white subject and compose<br />
your shot so that it also appears<br />
in the frame ( pg. 26).<br />
16. • Turn off the Video Echo mode<br />
( pg. 35).<br />
• Wait until the Picture Wipe or<br />
Dissolve effects are completed<br />
( pg. 28).<br />
• Change the setting of either the<br />
System Menu or the Power<br />
Switch ( pg. 21).<br />
• Do not attempt to take a Pro<br />
Snapshot when performing<br />
Digital Zoom ( pg. 29).<br />
• Release High Speed Recording<br />
( pg. 42).<br />
17. • Set the Power Switch to “ ”or<br />
“ ” ( pg. 13).<br />
• pg. 42.<br />
18. • Turn off Sepia and Monotone<br />
( pg. 34).<br />
19. • Turn off Sepia, Monotone or<br />
Slow Shutter before adding<br />
Dissolve to a scene transition<br />
( pg. 34).<br />
• Make sure that the Squeeze<br />
mode in the Recording Menu is<br />
set to “OFF” ( pg. 29).<br />
• Make sure you have selected<br />
the mode of Programme AE with<br />
special effects you want before<br />
starting editing ( pg. 34).<br />
CONTINUED ON NEXT PAGE


![TH-V70R[B] revision - JVC](https://img.yumpu.com/23738839/1/184x260/th-v70rb-revision-jvc.jpg?quality=85)