On-Board® W Module Programming and Operation ... - PTB Sales
On-Board® W Module Programming and Operation ... - PTB Sales
On-Board® W Module Programming and Operation ... - PTB Sales

You also want an ePaper? Increase the reach of your titles
YUMPU automatically turns print PDFs into web optimized ePapers that Google loves.
<strong>On</strong>-Board <strong>Module</strong> Replacement<br />
CTI-CRYOGENICS<br />
HELIX TECHNOLOGY CORPORATION<br />
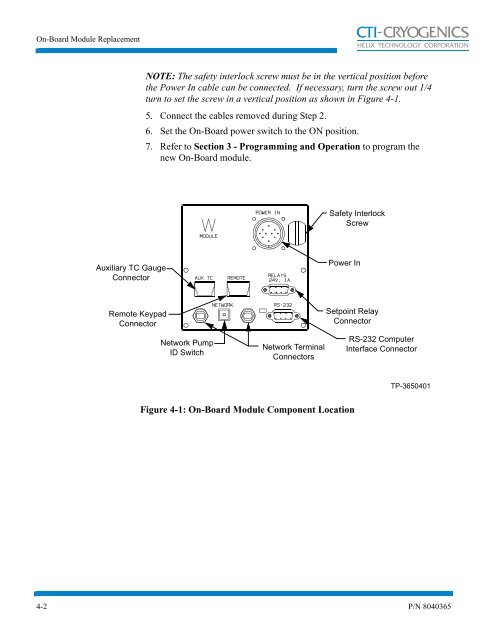
NOTE: The safety interlock screw must be in the vertical position before<br />
the Power In cable can be connected. If necessary, turn the screw out 1/4<br />
turn to set the screw in a vertical position as shown in Figure 4-1.<br />
5. Connect the cables removed during Step 2.<br />
6. Set the <strong>On</strong>-Board power switch to the ON position.<br />
7. Refer to Section 3 - <strong>Programming</strong> <strong>and</strong> <strong>Operation</strong> to program the<br />
new <strong>On</strong>-Board module.<br />
Safety Interlock<br />
Screw<br />
Auxiliary TC Gauge<br />
Connector<br />
Power In<br />
Remote Keypad<br />
Connector<br />
Network Pump<br />
ID Switch<br />
Network Terminal<br />
Connectors<br />
Setpoint Relay<br />
Connector<br />
RS-232 Computer<br />
Interface Connector<br />
TP-3650401<br />
Figure 4-1: <strong>On</strong>-Board <strong>Module</strong> Component Location<br />
4-2 P/N 8040365