

Versamark CS410 - Kodak
Versamark CS410 - Kodak
Versamark CS410 - Kodak

Create successful ePaper yourself
Turn your PDF publications into a flip-book with our unique Google optimized e-Paper software.
Chapter 1. Operator Controls<br />
Show Print Station Information<br />
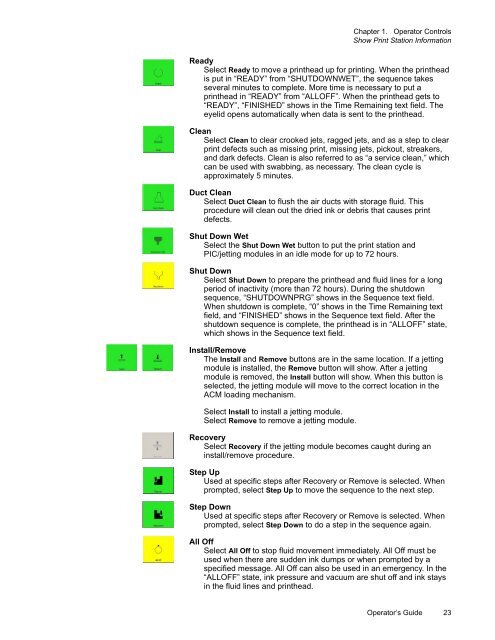
Ready<br />
Select Ready to move a printhead up for printing. When the printhead<br />
is put in “READY” from “SHUTDOWNWET”, the sequence takes<br />
several minutes to complete. More time is necessary to put a<br />
printhead in “READY” from “ALLOFF”. When the printhead gets to<br />
“READY”, “FINISHED” shows in the Time Remaining text field. The<br />
eyelid opens automatically when data is sent to the printhead.<br />
Clean<br />
Select Clean to clear crooked jets, ragged jets, and as a step to clear<br />
print defects such as missing print, missing jets, pickout, streakers,<br />
and dark defects. Clean is also referred to as “a service clean,” which<br />
can be used with swabbing, as necessary. The clean cycle is<br />
approximately 5 minutes.<br />
Duct Clean<br />
Select Duct Clean to flush the air ducts with storage fluid. This<br />
procedure will clean out the dried ink or debris that causes print<br />
defects.<br />
Shut Down Wet<br />
Select the Shut Down Wet button to put the print station and<br />
PIC/jetting modules in an idle mode for up to 72 hours.<br />
Shut Down<br />
Select Shut Down to prepare the printhead and fluid lines for a long<br />
period of inactivity (more than 72 hours). During the shutdown<br />
sequence, “SHUTDOWNPRG” shows in the Sequence text field.<br />
When shutdown is complete, “0” shows in the Time Remaining text<br />
field, and “FINISHED” shows in the Sequence text field. After the<br />
shutdown sequence is complete, the printhead is in “ALLOFF” state,<br />
which shows in the Sequence text field.<br />
Install/Remove<br />
The Install and Remove buttons are in the same location. If a jetting<br />
module is installed, the Remove button will show. After a jetting<br />
module is removed, the Install button will show. When this button is<br />
selected, the jetting module will move to the correct location in the<br />
ACM loading mechanism.<br />
Select Install to install a jetting module.<br />
Select Remove to remove a jetting module.<br />
Recovery<br />
Select Recovery if the jetting module becomes caught during an<br />
install/remove procedure.<br />
Step Up<br />
Used at specific steps after Recovery or Remove is selected. When<br />
prompted, select Step Up to move the sequence to the next step.<br />
Step Down<br />
Used at specific steps after Recovery or Remove is selected. When<br />
prompted, select Step Down to do a step in the sequence again.<br />
All Off<br />
Select All Off to stop fluid movement immediately. All Off must be<br />
used when there are sudden ink dumps or when prompted by a<br />
specified message. All Off can also be used in an emergency. In the<br />
“ALLOFF” state, ink pressure and vacuum are shut off and ink stays<br />
in the fluid lines and printhead.<br />
Operator’s Guide 23


