Inogen One G3 Technical Manual
Inogen One G3 Technical Manual
Inogen One G3 Technical Manual

Create successful ePaper yourself
Turn your PDF publications into a flip-book with our unique Google optimized e-Paper software.
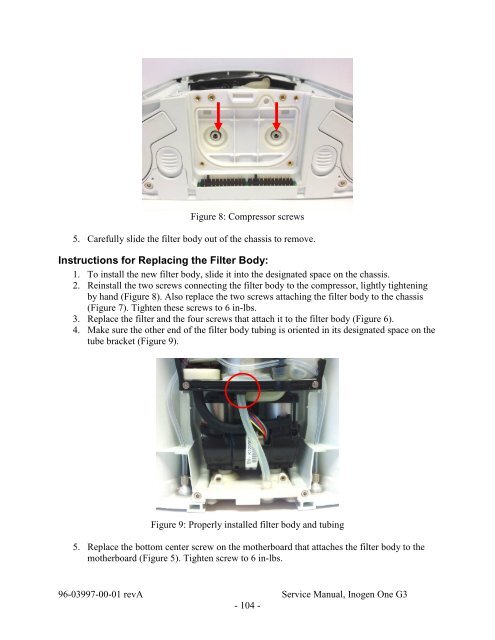
Figure 8: Compressor screws<br />
5. Carefully slide the filter body out of the chassis to remove.<br />
Instructions for Replacing the Filter Body:<br />
1. To install the new filter body, slide it into the designated space on the chassis.<br />
2. Reinstall the two screws connecting the filter body to the compressor, lightly tightening<br />
by hand (Figure 8). Also replace the two screws attaching the filter body to the chassis<br />
(Figure 7). Tighten these screws to 6 in-lbs.<br />
3. Replace the filter and the four screws that attach it to the filter body (Figure 6).<br />
4. Make sure the other end of the filter body tubing is oriented in its designated space on the<br />
tube bracket (Figure 9).<br />
Figure 9: Properly installed filter body and tubing<br />
5. Replace the bottom center screw on the motherboard that attaches the filter body to the<br />
motherboard (Figure 5). Tighten screw to 6 in-lbs.<br />
96-03997-00-01 revA Service <strong>Manual</strong>, <strong>Inogen</strong> <strong>One</strong> <strong>G3</strong><br />
- 104 -