FortiGate IPSec VPN User Guide - FirewallShop.com
FortiGate IPSec VPN User Guide - FirewallShop.com
FortiGate IPSec VPN User Guide - FirewallShop.com
You also want an ePaper? Increase the reach of your titles
YUMPU automatically turns print PDFs into web optimized ePapers that Google loves.
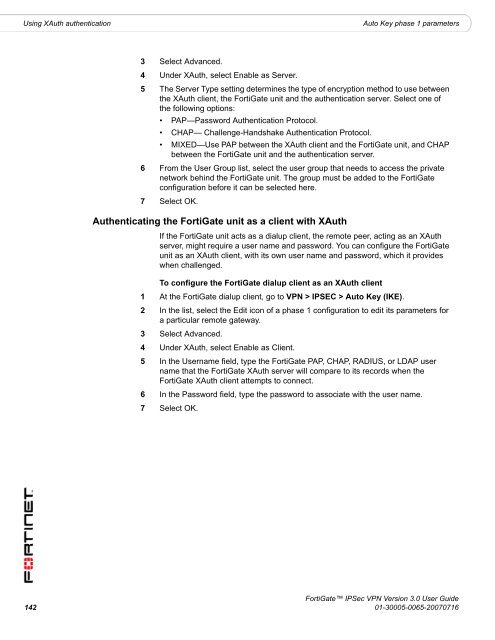
Using XAuth authentication<br />
Auto Key phase 1 parameters<br />
3 Select Advanced.<br />
4 Under XAuth, select Enable as Server.<br />
5 The Server Type setting determines the type of encryption method to use between<br />
the XAuth client, the <strong>FortiGate</strong> unit and the authentication server. Select one of<br />
the following options:<br />
• PAP—Password Authentication Protocol.<br />
• CHAP— Challenge-Handshake Authentication Protocol.<br />
• MIXED—Use PAP between the XAuth client and the <strong>FortiGate</strong> unit, and CHAP<br />
between the <strong>FortiGate</strong> unit and the authentication server.<br />
6 From the <strong>User</strong> Group list, select the user group that needs to access the private<br />
network behind the <strong>FortiGate</strong> unit. The group must be added to the <strong>FortiGate</strong><br />
configuration before it can be selected here.<br />
7 Select OK.<br />
Authenticating the <strong>FortiGate</strong> unit as a client with XAuth<br />
If the <strong>FortiGate</strong> unit acts as a dialup client, the remote peer, acting as an XAuth<br />
server, might require a user name and password. You can configure the <strong>FortiGate</strong><br />
unit as an XAuth client, with its own user name and password, which it provides<br />
when challenged.<br />
To configure the <strong>FortiGate</strong> dialup client as an XAuth client<br />
1 At the <strong>FortiGate</strong> dialup client, go to <strong>VPN</strong> > IPSEC > Auto Key (IKE).<br />
2 In the list, select the Edit icon of a phase 1 configuration to edit its parameters for<br />
a particular remote gateway.<br />
3 Select Advanced.<br />
4 Under XAuth, select Enable as Client.<br />
5 In the <strong>User</strong>name field, type the <strong>FortiGate</strong> PAP, CHAP, RADIUS, or LDAP user<br />
name that the <strong>FortiGate</strong> XAuth server will <strong>com</strong>pare to its records when the<br />
<strong>FortiGate</strong> XAuth client attempts to connect.<br />
6 In the Password field, type the password to associate with the user name.<br />
7 Select OK.<br />
<strong>FortiGate</strong> <strong>IPSec</strong> <strong>VPN</strong> Version 3.0 <strong>User</strong> <strong>Guide</strong><br />
142 01-30005-0065-20070716


