FortiGate IPSec VPN User Guide - FirewallShop.com
FortiGate IPSec VPN User Guide - FirewallShop.com
FortiGate IPSec VPN User Guide - FirewallShop.com
Create successful ePaper yourself
Turn your PDF publications into a flip-book with our unique Google optimized e-Paper software.
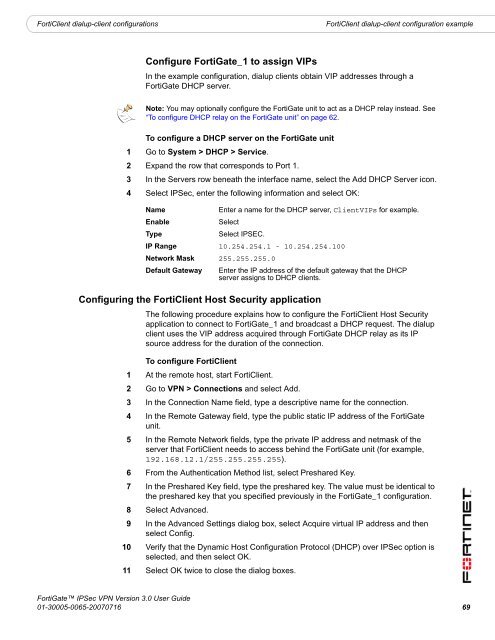
FortiClient dialup-client configurations<br />
FortiClient dialup-client configuration example<br />
Configure <strong>FortiGate</strong>_1 to assign VIPs<br />
In the example configuration, dialup clients obtain VIP addresses through a<br />
<strong>FortiGate</strong> DHCP server.<br />
Note: You may optionally configure the <strong>FortiGate</strong> unit to act as a DHCP relay instead. See<br />
“To configure DHCP relay on the <strong>FortiGate</strong> unit” on page 62.<br />
To configure a DHCP server on the <strong>FortiGate</strong> unit<br />
1 Go to System > DHCP > Service.<br />
2 Expand the row that corresponds to Port 1.<br />
3 In the Servers row beneath the interface name, select the Add DHCP Server icon.<br />
4 Select <strong>IPSec</strong>, enter the following information and select OK:<br />
Name<br />
Enter a name for the DHCP server, ClientVIPs for example.<br />
Enable<br />
Select<br />
Type<br />
Select IPSEC.<br />
IP Range 10.254.254.1 - 10.254.254.100<br />
Network Mask 255.255.255.0<br />
Default Gateway Enter the IP address of the default gateway that the DHCP<br />
server assigns to DHCP clients.<br />
Configuring the FortiClient Host Security application<br />
The following procedure explains how to configure the FortiClient Host Security<br />
application to connect to <strong>FortiGate</strong>_1 and broadcast a DHCP request. The dialup<br />
client uses the VIP address acquired through <strong>FortiGate</strong> DHCP relay as its IP<br />
source address for the duration of the connection.<br />
To configure FortiClient<br />
1 At the remote host, start FortiClient.<br />
2 Go to <strong>VPN</strong> > Connections and select Add.<br />
3 In the Connection Name field, type a descriptive name for the connection.<br />
4 In the Remote Gateway field, type the public static IP address of the <strong>FortiGate</strong><br />
unit.<br />
5 In the Remote Network fields, type the private IP address and netmask of the<br />
server that FortiClient needs to access behind the <strong>FortiGate</strong> unit (for example,<br />
192.168.12.1/255.255.255.255).<br />
6 From the Authentication Method list, select Preshared Key.<br />
7 In the Preshared Key field, type the preshared key. The value must be identical to<br />
the preshared key that you specified previously in the <strong>FortiGate</strong>_1 configuration.<br />
8 Select Advanced.<br />
9 In the Advanced Settings dialog box, select Acquire virtual IP address and then<br />
select Config.<br />
10 Verify that the Dynamic Host Configuration Protocol (DHCP) over <strong>IPSec</strong> option is<br />
selected, and then select OK.<br />
11 Select OK twice to close the dialog boxes.<br />
<strong>FortiGate</strong> <strong>IPSec</strong> <strong>VPN</strong> Version 3.0 <strong>User</strong> <strong>Guide</strong><br />
01-30005-0065-20070716 69


