DevKit8500D/A User Manual - DMCS Pages for Students
DevKit8500D/A User Manual - DMCS Pages for Students
DevKit8500D/A User Manual - DMCS Pages for Students
You also want an ePaper? Increase the reach of your titles
YUMPU automatically turns print PDFs into web optimized ePapers that Google loves.
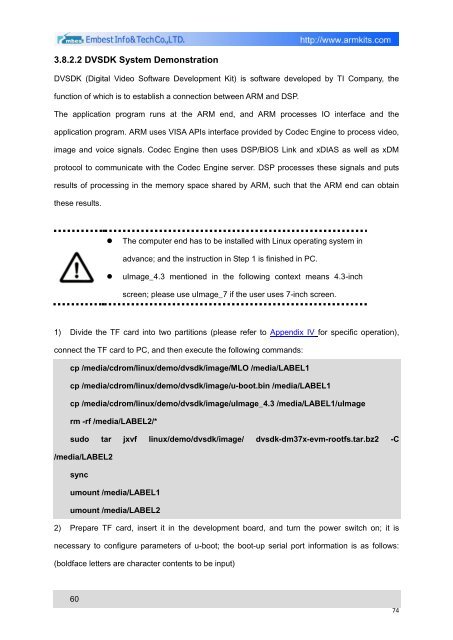
3.8.2.2 DVSDK System Demonstration<br />
DVSDK (Digital Video Software Development Kit) is software developed by TI Company, the<br />
function of which is to establish a connection between ARM and DSP.<br />
The application program runs at the ARM end, and ARM processes IO interface and the<br />
application program. ARM uses VISA APIs interface provided by Codec Engine to process video,<br />
image and voice signals. Codec Engine then uses DSP/BIOS Link and xDIAS as well as xDM<br />
protocol to communicate with the Codec Engine server. DSP processes these signals and puts<br />
results of processing in the memory space shared by ARM, such that the ARM end can obtain<br />
these results.<br />
• The computer end has to be installed with Linux operating system in<br />
advance; and the instruction in Step 1 is finished in PC.<br />
• uImage_4.3 mentioned in the following context means 4.3-inch<br />
screen; please use uImage_7 if the user uses 7-inch screen.<br />
1) Divide the TF card into two partitions (please refer to Appendix IV <strong>for</strong> specific operation),<br />
connect the TF card to PC, and then execute the following commands:<br />
cp /media/cdrom/linux/demo/dvsdk/image/MLO /media/LABEL1<br />
cp /media/cdrom/linux/demo/dvsdk/image/u-boot.bin /media/LABEL1<br />
cp /media/cdrom/linux/demo/dvsdk/image/uImage_4.3 /media/LABEL1/uImage<br />
rm -rf /media/LABEL2/*<br />
sudo tar jxvf linux/demo/dvsdk/image/ dvsdk-dm37x-evm-rootfs.tar.bz2 -C<br />
/media/LABEL2<br />
sync<br />
umount /media/LABEL1<br />
umount /media/LABEL2<br />
2) Prepare TF card, insert it in the development board, and turn the power switch on; it is<br />
necessary to configure parameters of u-boot; the boot-up serial port in<strong>for</strong>mation is as follows:<br />
(boldface letters are character contents to be input)<br />
60<br />
74


