DevKit8500D/A User Manual - DMCS Pages for Students
DevKit8500D/A User Manual - DMCS Pages for Students
DevKit8500D/A User Manual - DMCS Pages for Students

You also want an ePaper? Increase the reach of your titles
YUMPU automatically turns print PDFs into web optimized ePapers that Google loves.
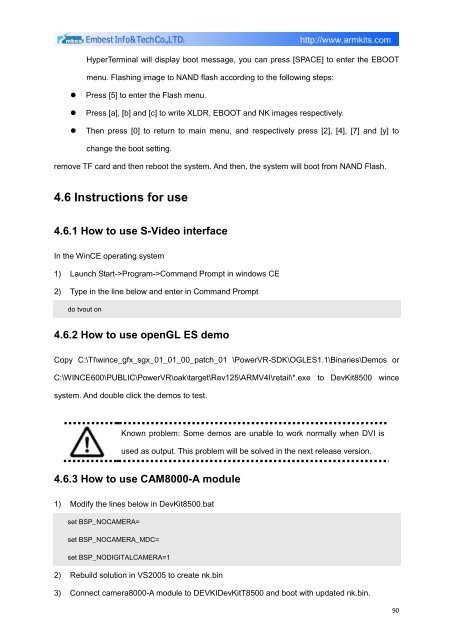
HyperTerminal will display boot message, you can press [SPACE] to enter the EBOOT<br />
menu. Flashing image to NAND flash according to the following steps:<br />
• Press [5] to enter the Flash menu.<br />
• Press [a], [b] and [c] to write XLDR, EBOOT and NK images respectively.<br />
• Then press [0] to return to main menu, and respectively press [2], [4], [7] and [y] to<br />
change the boot setting.<br />
remove TF card and then reboot the system. And then, the system will boot from NAND Flash.<br />
4.6 Instructions <strong>for</strong> use<br />
4.6.1 How to use S-Video interface<br />
In the WinCE operating system<br />
1) Launch Start->Program->Command Prompt in windows CE<br />
2) Type in the line below and enter in Command Prompt<br />
do tvout on<br />
4.6.2 How to use openGL ES demo<br />
Copy C:\TI\wince_gfx_sgx_01_01_00_patch_01 \PowerVR-SDK\OGLES1.1\Binaries\Demos or<br />
C:\WINCE600\PUBLIC\PowerVR\oak\target\Rev125\ARMV4I\retail\*.exe to DevKit8500 wince<br />
system. And double click the demos to test.<br />
Known problem: Some demos are unable to work normally when DVI is<br />
used as output. This problem will be solved in the next release version.<br />
4.6.3 How to use CAM8000-A module<br />
1) Modify the lines below in DevKit8500.bat<br />
set BSP_NOCAMERA=<br />
set BSP_NOCAMERA_MDC=<br />
set BSP_NODIGITALCAMERA=1<br />
2) Rebuild solution in VS2005 to create nk.bin<br />
3) Connect camera8000-A module to DEVKIDevKitT8500 and boot with updated nk.bin.<br />
90