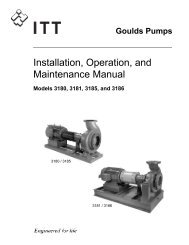
Installation Operation and Maintenance Manual
Installation Operation and Maintenance Manual (IOM) - Goulds Pumps
Installation Operation and Maintenance Manual (IOM) - Goulds Pumps

Create successful ePaper yourself
Turn your PDF publications into a flip-book with our unique Google optimized e-Paper software.
Commissioning, Startup, <strong>Operation</strong>, <strong>and</strong> Shutdown (Continued)Install the coupling guardCouplings must have proper certification to be used in an ATEX classified environment. Use theinstructions from the coupling manufacturer in order to lubricate <strong>and</strong> install the coupling.WARNING:• Never operate the pump without the coupling guard correctly installed.• Always disconnect <strong>and</strong> lock out power to the driver before you perform any installation ormaintenance tasks. Failure to disconnect <strong>and</strong> lock out driver power will result in serious physicalinjury.• The coupling used in an Ex-classified environment must be properly certified <strong>and</strong> must beconstructed from a non-sparking material.Required parts:1 2 34 561. End plate, drive end2. End plate, pump end3. Guard half, 2 required4. 3/8-16 nut, 3 required5. 3/8 in. washer6. 3/8-16 x 2 in. hex head bolt, 3 required1. De-energize the motor, place the motor in a locked-out position, <strong>and</strong> place a caution tag at the starterthat indicates the disconnect.2. Put the pump-side end plate in place.If the pump-side end plate is already in place, make any necessary coupling adjustments <strong>and</strong> thenproceed to the next step.If the pump size is...STi, MTi, LTiThen...Align the pump-side end plate to the bearing frame. You do not need toadjust the impeller.1. Align the end plate on the pump side to the bearing housing so thatyou meet these conditions:a. The large slots on the end plate do not touch the bearing housingtap bolts.b. The small slots align with the impeller adjusting bolts.2. Fasten the end plate to the bearing housing using the jam nuts on theimpeller adjusting bolts.3. Check the impeller clearance. Refer to the impeller clearance table forthe correct impeller clearance.52 Model 3796 i-FRAME <strong>Installation</strong>, <strong>Operation</strong>, <strong>and</strong> <strong>Maintenance</strong> <strong>Manual</strong>