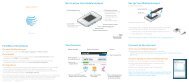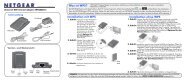
Reference Manual for the Model CG814M Wireless Cable ... - netgear
Reference Manual for the Model CG814M Wireless Cable ... - netgear
Reference Manual for the Model CG814M Wireless Cable ... - netgear

Create successful ePaper yourself
Turn your PDF publications into a flip-book with our unique Google optimized e-Paper software.
<strong>Reference</strong> <strong>Manual</strong> <strong>for</strong> <strong>the</strong> <strong>Model</strong> <strong>CG814M</strong> <strong>Wireless</strong> <strong>Cable</strong> Modem Gateway<br />
If you need Client <strong>for</strong> Microsoft Networks:<br />
a. Click <strong>the</strong> Add button.<br />
b. Select Client, and <strong>the</strong>n click Add.<br />
c. Select Microsoft.<br />
d. Select Client <strong>for</strong> Microsoft Networks, and <strong>the</strong>n click OK.<br />
3. Restart your PC <strong>for</strong> <strong>the</strong> changes to take effect.<br />
Enabling DHCP to Automatically Configure TCP/IP Settings<br />
After <strong>the</strong> TCP/IP protocol components are installed, each PC must be assigned specific<br />
in<strong>for</strong>mation about itself and resources that are available on its network. The simplest way to<br />
configure this in<strong>for</strong>mation is to allow <strong>the</strong> PC to obtain <strong>the</strong> in<strong>for</strong>mation from <strong>the</strong> internal DHCP<br />
server of <strong>the</strong> <strong>CG814M</strong> Gateway. To use DHCP with <strong>the</strong> recommended default addresses, follow<br />
<strong>the</strong>se steps:<br />
1. Connect all PCs to <strong>the</strong> gateway, <strong>the</strong>n restart <strong>the</strong> gateway and allow it to boot.<br />
2. On each attached PC, open <strong>the</strong> Network control panel (refer to <strong>the</strong> previous section) and select<br />
<strong>the</strong> Configuration tab.<br />
3. From <strong>the</strong> components list, select TCP/IP->(your E<strong>the</strong>rnet adapter) and click Properties.<br />
4. In <strong>the</strong> IP Address tab, select “Obtain an IP address automatically”.<br />
5. Select <strong>the</strong> Gateway tab.<br />
6. If any gateways are shown, remove <strong>the</strong>m.<br />
7. Click OK.<br />
8. Restart <strong>the</strong> PC.<br />
Repeat steps 2 through 8 <strong>for</strong> each PC on your network.<br />
Selecting Windows’ Internet Access Method<br />
1. On <strong>the</strong> Windows taskbar, click <strong>the</strong> Start button, point to Settings, and <strong>the</strong>n click Control Panel.<br />
2. Double-click <strong>the</strong> Internet Options icon.<br />
3. Select “I want to set up my Internet connection manually” or “I want to connect through a<br />
Local Area Network” and click Next.<br />
4. Select “I want to connect through a Local Area Network” and click Next.<br />
C-4 Preparing Your Network