Using ChemFinder - CambridgeSoft
Using ChemFinder - CambridgeSoft
Using ChemFinder - CambridgeSoft

You also want an ePaper? Increase the reach of your titles
YUMPU automatically turns print PDFs into web optimized ePapers that Google loves.
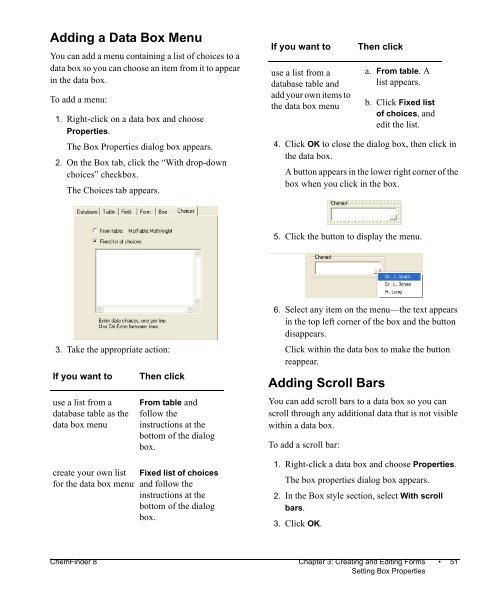
Adding a Data Box Menu<br />
You can add a menu containing a list of choices to a<br />
data box so you can choose an item from it to appear<br />
in the data box.<br />
To add a menu:<br />
1. Right-click on a data box and choose<br />
Properties.<br />
The Box Properties dialog box appears.<br />
2. On the Box tab, click the “With drop-down<br />
choices” checkbox.<br />
The Choices tab appears.<br />
3. Take the appropriate action:<br />
If you want to Then click<br />
use a list from a<br />
database table as the<br />
data box menu<br />
create your own list<br />
for the data box menu<br />
From table and<br />
follow the<br />
instructions at the<br />
bottom of the dialog<br />
box.<br />
Fixed list of choices<br />
and follow the<br />
instructions at the<br />
bottom of the dialog<br />
box.<br />
If you want to Then click<br />
use a list from a<br />
database table and<br />
add your own items to<br />
the data box menu<br />
4. Click OK to close the dialog box, then click in<br />
the data box.<br />
A button appears in the lower right corner of the<br />
box when you click in the box.<br />
5. Click the button to display the menu.<br />
6. Select any item on the menu—the text appears<br />
in the top left corner of the box and the button<br />
disappears.<br />
Click within the data box to make the button<br />
reappear.<br />
Adding Scroll Bars<br />
You can add scroll bars to a data box so you can<br />
scroll through any additional data that is not visible<br />
within a data box.<br />
To add a scroll bar:<br />
1. Right-click a data box and choose Properties.<br />
The box properties dialog box appears.<br />
2. In the Box style section, select With scroll<br />
bars.<br />
3. Click OK.<br />
a. From table. A<br />
list appears.<br />
b. Click Fixed list<br />
of choices, and<br />
edit the list.<br />
<strong>ChemFinder</strong> 8 Chapter 3: Creating and Editing Forms • 51<br />
Setting Box Properties