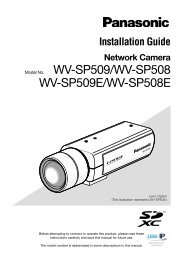
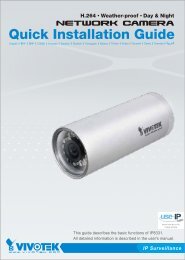
livePresetPreset is a specific position remembered by the PTZ camera. You can use the Preset function to define up to20 presets for a single PTZ camera.2011-01-0101:10:25❖ To add a preset1. Check the preset checkbox.2. Select .The virtual keyboard will appear on the screen. <strong>Use</strong> it to provide the preset name.` Refer to "Using Virtual Keyboard". (Page 43)• Rename : You can change the preset settings to your preference.• Delete : Delete a selected preset.• Delete All : Delete all the existing preset settings.M` You can add up to 20 presets, which is the max count supported by the NVR.` If you replace a camera that saves your preset settings with a different one, you must configure the preset settings again.3. Select .The preset setting will be saved in the provided name.❖ To change or delete a registered preset2011-01-0101:10:251. Check the preset checkbox and select a preset to change or delete.2. Press or as needed.• Delete All: Delete all the existing preset settings.J` If you delete the entire presets, the default presets specified in the network camera can be deleted accordingly.3. Provide a new name and press .40_ live
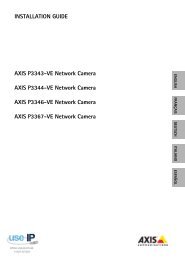
Menu SetupYou can setup the system properties, devices, and options for recording, event,backup and network.SYSTEM SETUPYou can setup Date/Time/Language, Permission, System Properties and Log.Date/Time/LanguageYou can check and setup the current Date/Time and time related properties, as well as the language used forthe interface on the screen.[MENU] ► [ENTER] ▲▼◄► [ENTER]● MENU SETUP• Date : Sets the date that will appear on the screen.You can select the date format.• Time : Sets the time and its format that will appear on the screen.• Time Zone : Sets the time zone of your area based on the Greenwich Mean Time (GMT).` GMT (Greenwich Mean Time) is standard World Time and the basis of world time zone.• Time Sync. : Specify the use of synchronization with the time server. If you select to use the ,the current time will be synchronized on a regular basis by the server defined as .If this is the case, you cannot change the time setting manually.- Synchronization : Specify the use of synchronization with the time server.- Time Server : Enter an <strong>IP</strong> or URL address of the time server.- Last Sync Time : Displays the most recent synchronization time from the selected time server.- Activate as Server : Set to to allow the NVR to act as a Time Server for other NVRs.• DST : Set up Daylight Saving Time with its period to make the time earlier than the GMT of its time zone by1 hour during the set period.• Language : Select your language. Sets the language for the interface.English, French, German, Spanish, Italian, Chinese, Russian, Korean, Polish, Japanese, Dutch, Portuguese,Turkish, Czech, Danish, Swedish, Thai, Romanian, Serbian, Croatian, Hungarian and Greek are available.M` You can also use numeric buttons on the remote control to enter values for Date, Time and other numeric fields.English _41