

Audio Interface / Mobile Preamp - zZounds.com
Audio Interface / Mobile Preamp - zZounds.com
Audio Interface / Mobile Preamp - zZounds.com

You also want an ePaper? Increase the reach of your titles
YUMPU automatically turns print PDFs into web optimized ePapers that Google loves.
Tutorials<br />
TIP . . .<br />
You can create a new track<br />
by selecting Clone, from the<br />
Track menu. This handy<br />
feature duplicates the<br />
currently selected track<br />
<strong>com</strong>plete with input/output<br />
routings.<br />
6. If your input signal is either too weak or too strong, adjust the input level<br />
control on the Tracker Pre.<br />
7. Optional Step - Metronome: From the Options Menu, select Project. Select<br />
the Metronome tab. Next select “Use <strong>Audio</strong> Metronome”. Click OK. Make<br />
sure the Metronome During Record button in the Transport Bar is On.<br />
Record a Track<br />
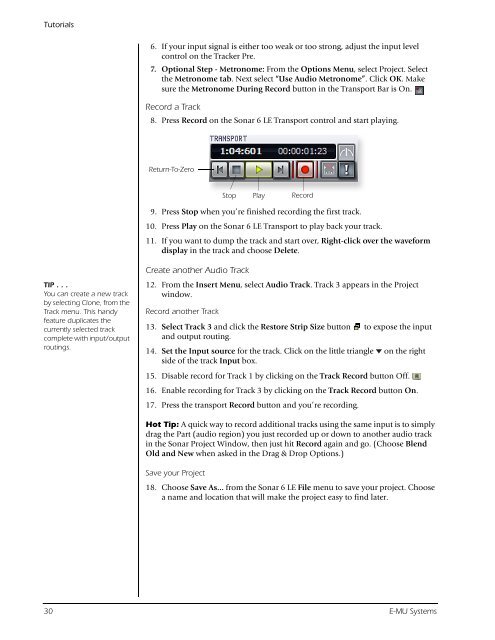
8. Press Record on the Sonar 6 LE Transport control and start playing.<br />
Return-To-Zero<br />
9. Press Stop when you’re finished recording the first track.<br />
10. Press Play on the Sonar 6 LE Transport to play back your track.<br />
11. If you want to dump the track and start over, Right-click over the waveform<br />
display in the track and choose Delete.<br />
Create another <strong>Audio</strong> Track<br />
12. From the Insert Menu, select <strong>Audio</strong> Track. Track 3 appears in the Project<br />
window.<br />
Record another Track<br />
Stop<br />
Record<br />
13. Select Track 3 and click the Restore Strip Size button to expose the input<br />
and output routing.<br />
14. Set the Input source for the track. Click on the little triangle on the right<br />
side of the track Input box.<br />
15. Disable record for Track 1 by clicking on the Track Record button Off.<br />
16. Enable recording for Track 3 by clicking on the Track Record button On.<br />
17. Press the transport Record button and you’re recording.<br />
Hot Tip: A quick way to record additional tracks using the same input is to simply<br />
drag the Part (audio region) you just recorded up or down to another audio track<br />
in the Sonar Project Window, then just hit Record again and go. (Choose Blend<br />
Old and New when asked in the Drag & Drop Options.)<br />
Save your Project<br />
18. Choose Save As… from the Sonar 6 LE File menu to save your project. Choose<br />
a name and location that will make the project easy to find later.<br />
30 E-MU Systems<br />
Play


