LTI TRUCAM LASER MEASUREMENT DEVICE - Tele-Traffic
LTI TRUCAM LASER MEASUREMENT DEVICE - Tele-Traffic
LTI TRUCAM LASER MEASUREMENT DEVICE - Tele-Traffic

You also want an ePaper? Increase the reach of your titles
YUMPU automatically turns print PDFs into web optimized ePapers that Google loves.
Sighting Scope<br />
A single-power sighting scope is mounted on top of the TruCAM as Standard, however there is an<br />
option to attach a 3.5 power magnifier if required.<br />
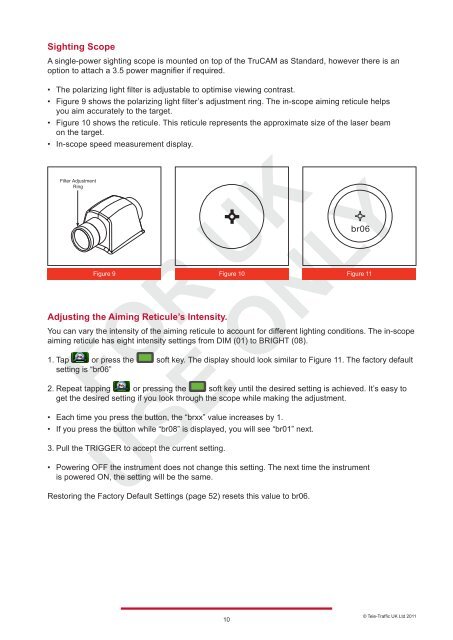
• The polarizing light filter is adjustable to optimise viewing contrast.<br />
• Figure 9 shows the polarizing light filter’s adjustment ring. The in-scope aiming reticule helps<br />
you aim accurately to the target.<br />
• Figure 10 shows the reticule. This reticule represents the approximate size of the laser beam<br />
on the target.<br />
• In-scope speed measurement display.<br />
Filter Adjustment<br />
Ring<br />
Adjusting the Aiming Reticule’s Intensity.<br />
You can vary the intensity of the aiming reticule to account for different lighting conditions. The in-scope<br />
aiming reticule has eight intensity settings from DIM (01) to BRIGHT (08).<br />
<br />
1. Tap or press the soft key. The display should look similar to Figure 11. The factory default<br />
setting is “br06”<br />
<br />
2. Repeat tapping or pressing the soft key until the desired setting is achieved. It’s easy to<br />
get the desired setting if you look through the scope while making the adjustment.<br />
• Each time you press the button, the “brxx” value increases by 1.<br />
• If you press the button while “br08” is displayed, you will see “br01” next.<br />
3. Pull the TRIGGER to accept the current setting.<br />
• Powering OFF the instrument does not change this setting. The next time the instrument<br />
is powered ON, the setting will be the same.<br />
Restoring the Factory Default Settings (page 52) resets this value to br06.<br />
10<br />
br06<br />
Figure 9 Figure 10<br />
Figure 11<br />
© <strong>Tele</strong>-<strong>Traffic</strong> UK Ltd 2011