OS 75x100 mm.pdfTélécharger - KWH Mirka Ltd
OS 75x100 mm.pdfTélécharger - KWH Mirka Ltd
OS 75x100 mm.pdfTélécharger - KWH Mirka Ltd
You also want an ePaper? Increase the reach of your titles
YUMPU automatically turns print PDFs into web optimized ePapers that Google loves.
8<br />
MIRKA 10,000 OPM<br />
75 <strong>mm</strong> x 100 <strong>mm</strong> (3 in x 4 in.)<br />
ORBITAL SANDER<br />
SERVICE INSTRUCTIONS<br />
NOTICE: To receive any expressed or implied warranty, tool must be repaired by an authorized <strong>Mirka</strong> Service Center. The following<br />
general service instructions provided are for use after completion of the warranty period.<br />
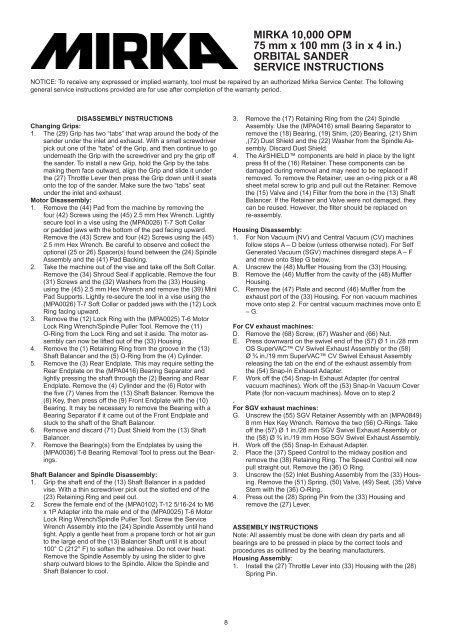
DISASSEMBLY INSTRUCTIONS<br />
Changing Grips:<br />
1. The (29) Grip has two “tabs” that wrap around the body of the<br />
sander under the inlet and exhaust. With a small screwdriver<br />
pick out one of the “tabs” of the Grip, and then continue to go<br />
underneath the Grip with the screwdriver and pry the grip off<br />
the sander. To install a new Grip, hold the Grip by the tabs<br />
making them face outward, align the Grip and slide it under<br />
the (27) Throttle Lever then press the Grip down until it seats<br />
onto the top of the sander. Make sure the two “tabs” seat<br />
under the inlet and exhaust<br />
Motor Disassembly:<br />
1. Remove the (44) Pad from the machine by removing the<br />
four (42) Screws using the (45) 2.5 <strong>mm</strong> Hex Wrench. Lightly<br />
secure tool in a vise using the (MPA0026) T-7 Soft Collar<br />
or padded jaws with the bottom of the pad facing upward.<br />
Remove the (43) Screw and four (42) Screws using the (45)<br />
2.5 <strong>mm</strong> Hex Wrench. Be careful to observe and collect the<br />
optional (25 or 26) Spacer(s) found between the (24) Spindle<br />
Assembly and the (41) Pad Backing.<br />
2. Take the machine out of the vise and take off the Soft Collar.<br />
Remove the (34) Shroud Seal if applicable. Remove the four<br />
(31) Screws and the (32) Washers from the (33) Housing<br />
using the (45) 2.5 <strong>mm</strong> Hex Wrench and remove the (39) Mini<br />
Pad Supports. Lightly re-secure the tool in a vise using the<br />
(MPA0026) T-7 Soft Collar or padded jaws with the (12) Lock<br />
Ring facing upward.<br />
3. Remove the (12) Lock Ring with the (MPA0025) T-6 Motor<br />
Lock Ring Wrench/Spindle Puller Tool. Remove the (11)<br />
O-Ring from the Lock Ring and set it aside. The motor assembly<br />
can now be lifted out of the (33) Housing.<br />
4. Remove the (1) Retaining Ring from the groove in the (13)<br />
Shaft Balancer and the (5) O-Ring from the (4) Cylinder.<br />
5. Remove the (3) Rear Endplate. This may require setting the<br />
Rear Endplate on the (MPA0416) Bearing Separator and<br />
lightly pressing the shaft through the (2) Bearing and Rear<br />
Endplate. Remove the (4) Cylinder and the (6) Rotor with<br />
the five (7) Vanes from the (13) Shaft Balancer. Remove the<br />
(8) Key, then press off the (9) Front Endplate with the (10)<br />
Bearing. It may be necessary to remove the Bearing with a<br />
Bearing Separator if it came out of the Front Endplate and<br />
stuck to the shaft of the Shaft Balancer.<br />
6. Remove and discard (71) Dust Shield from the (13) Shaft<br />
Balancer.<br />
7. Remove the Bearing(s) from the Endplates by using the<br />
(MPA0036) T-8 Bearing Removal Tool to press out the Bearings.<br />
Shaft Balancer and Spindle Disassembly:<br />
1. Grip the shaft end of the (13) Shaft Balancer in a padded<br />
vise. With a thin screwdriver pick out the slotted end of the<br />
(23) Retaining Ring and peel out.<br />
2. Screw the female end of the (MPA0102) T-12 5/16-24 to M6<br />
x 1P Adapter into the male end of the (MPA0025) T-6 Motor<br />
Lock Ring Wrench/Spindle Puller Tool. Screw the Service<br />
Wrench Assembly into the (24) Spindle Assembly until hand<br />
tight. Apply a gentle heat from a propane torch or hot air gun<br />
to the large end of the (13) Balancer Shaft until it is about<br />
100° C (212° F) to soften the adhesive. Do not over heat.<br />
Remove the Spindle Assembly by using the slider to give<br />
sharp outward blows to the Spindle. Allow the Spindle and<br />
Shaft Balancer to cool.<br />
3. Remove the (17) Retaining Ring from the (24) Spindle<br />
Assembly. Use the (MPA0416) small Bearing Separator to<br />
remove the (18) Bearing, (19) Shim, (20) Bearing, (21) Shim<br />
,(72) Dust Shield and the (22) Washer from the Spindle Assembly.<br />
Discard Dust Shield.<br />
4. The AirSHIELD components are held in place by the light<br />
press fit of the (16) Retainer. These components can be<br />
damaged during removal and may need to be replaced if<br />
removed. To remove the Retainer, use an o-ring pick or a #8<br />
sheet metal screw to grip and pull out the Retainer. Remove<br />
the (15) Valve and (14) Filter from the bore in the (13) Shaft<br />
Balancer. If the Retainer and Valve were not damaged, they<br />
can be reused. However, the filter should be replaced on<br />
re-assembly.<br />
Housing Disassembly:<br />
1. For Non Vacuum (NV) and Central Vacuum (CV) machines<br />
follow steps A – D below (unless otherwise noted). For Self<br />
Generated Vacuum (SGV) machines disregard steps A – F<br />
and move onto Step G below.<br />
A. Unscrew the (48) Muffler Housing from the (33) Housing.<br />
B. Remove the (46) Muffler from the cavity of the (48) Muffler<br />
Housing.<br />
C. Remove the (47) Plate and second (46) Muffler from the<br />
exhaust port of the (33) Housing. For non vacuum machines<br />
move onto step 2. For central vacuum machines move onto E<br />
– G.<br />
For CV exhaust machines:<br />
D. Remove the (68) Screw, (67) Washer and (66) Nut.<br />
E. Press downward on the swivel end of the (57) Ø 1 in./28 <strong>mm</strong><br />
<strong>OS</strong> SuperVAC CV Swivel Exhaust Assembly or the (58)<br />
Ø ¾ in./19 <strong>mm</strong> SuperVAC CV Swivel Exhaust Assembly<br />
releasing the tab on the end of the exhaust assembly from<br />
the (54) Snap-In Exhaust Adapter.<br />
F. Work off the (54) Snap-In Exhaust Adapter (for central<br />
vacuum machines). Work off the (53) Snap-In Vacuum Cover<br />
Plate (for non-vacuum machines). Move on to step 2<br />
.<br />
For SGV exhaust machines:<br />
G. Unscrew the (55) SGV Retainer Assembly with an (MPA0849)<br />
8 <strong>mm</strong> Hex Key Wrench. Remove the two (56) O-Rings. Take<br />
off the (57) Ø 1 in./28 <strong>mm</strong> SGV Swivel Exhaust Assembly or<br />
the (58) Ø ¾ in./19 <strong>mm</strong> Hose SGV Swivel Exhaust Assembly.<br />
H. Work off the (55) Snap-In Exhaust Adapter.<br />
2. Place the (37) Speed Control to the midway position and<br />
remove the (38) Retaining Ring. The Speed Control will now<br />
pull straight out. Remove the (36) O Ring.<br />
3. Unscrew the (52) Inlet Bushing Assembly from the (33) Housing.<br />
Remove the (51) Spring, (50) Valve, (49) Seat, (35) Valve<br />
Stem with the (36) O-Ring.<br />
4. Press out the (28) Spring Pin from the (33) Housing and<br />
remove the (27) Lever.<br />
ASSEMBLY INSTRUCTIONS<br />
Note: All assembly must be done with clean dry parts and all<br />
bearings are to be pressed in place by the correct tools and<br />
procedures as outlined by the bearing manufacturers.<br />
Housing Assembly:<br />
1. Install the (27) Throttle Lever into (33) Housing with the (28)<br />
Spring Pin.


