ROS 125 150 mm.pdfTélécharger - Mirka
ROS 125 150 mm.pdfTélécharger - Mirka
ROS 125 150 mm.pdfTélécharger - Mirka

You also want an ePaper? Increase the reach of your titles
YUMPU automatically turns print PDFs into web optimized ePapers that Google loves.
Please Read and Comply with<br />
1) General Industry Safety & Health Regulations, Part 1910,<br />
OSHA 2206, available from: Superintendent of Documents;<br />
Government Printing Office; Washington DC 20402<br />
2) Safety Code for Portable Air Tools, ANSI B186.1 available from:<br />
American National Standards Institute, Inc.; 1430 Broadway;<br />
New York, New York 10018<br />
3) State and Local Regulations.<br />
Proper Use of Tool<br />
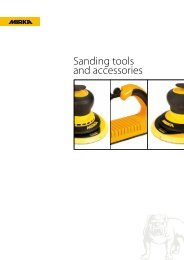
This sander is designed for sanding all types of materials i.e.<br />
metals, wood, stone, plastics, etc. using abrasive designed for this<br />
purpose. Do not use this sander for any other purpose than that<br />
specified without consulting the manufacturer or the manufacturer’s<br />
authorized supplier. Do not use back-up pads that have a<br />
working speed less than 12,000 RPM free speed.<br />
Work Stations<br />
The tool is intended to be operated as a hand held tool. It is<br />
always reco<strong>mm</strong>ended that the tool be used when standing on a<br />
solid floor. It can be in any position but before any such use, the<br />
operator must be in a secure position having a firm grip and footing<br />
and be aware that the sander can develop a torque reaction.<br />
See the section “Operating Instructions”.<br />
Putting the Tool into Service<br />
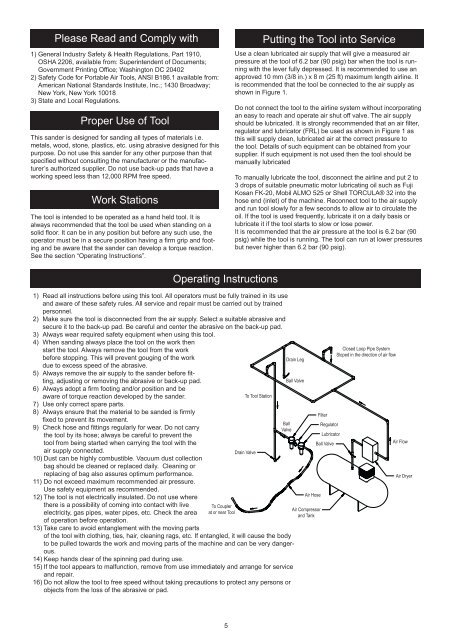
Use a clean lubricated air supply that will give a measured air<br />
pressure at the tool of 6.2 bar (90 psig) bar when the tool is running<br />
with the lever fully depressed. It is reco<strong>mm</strong>ended to use an<br />
approved 10 <strong>mm</strong> (3/8 in.) x 8 m (25 ft) maximum length airline. It<br />
is reco<strong>mm</strong>ended that the tool be connected to the air supply as<br />
shown in Figure 1.<br />
Do not connect the tool to the airline system without incorporating<br />
an easy to reach and operate air shut off valve. The air supply<br />
should be lubricated. It is strongly reco<strong>mm</strong>ended that an air filter,<br />
regulator and lubricator (FRL) be used as shown in Figure 1 as<br />
this will supply clean, lubricated air at the correct pressure to<br />
the tool. Details of such equipment can be obtained from your<br />
supplier. If such equipment is not used then the tool should be<br />
manually lubricated<br />
To manually lubricate the tool, disconnect the airline and put 2 to<br />
3 drops of suitable pneumatic motor lubricating oil such as Fuji<br />
Kosan FK-20, Mobil ALMO 525 or Shell TORCULA® 32 into the<br />
hose end (inlet) of the machine. Reconnect tool to the air supply<br />
and run tool slowly for a few seconds to allow air to circulate the<br />
oil. If the tool is used frequently, lubricate it on a daily basis or<br />
lubricate it if the tool starts to slow or lose power.<br />
It is reco<strong>mm</strong>ended that the air pressure at the tool is 6.2 bar (90<br />
psig) while the tool is running. The tool can run at lower pressures<br />
but never higher than 6.2 bar (90 psig).<br />
Operating Instructions<br />
1) Read all instructions before using this tool. All operators must be fully trained in its use<br />
and aware of these safety rules. All service and repair must be carried out by trained<br />
personnel.<br />
2) Make sure the tool is disconnected from the air supply. Select a suitable abrasive and<br />
secure it to the back-up pad. Be careful and center the abrasive on the back-up pad.<br />
3) Always wear required safety equipment when using this tool.<br />
4) When sanding always place the tool on the work then<br />
start the tool. Always remove the tool from the work<br />
before stopping. This will prevent gouging of the work<br />
due to excess speed of the abrasive.<br />
5) Always remove the air supply to the sander before fitting,<br />
adjusting or removing the abrasive or back-up pad.<br />
6) Always adopt a firm footing and/or position and be<br />
aware of torque reaction developed by the sander.<br />
7) Use only correct spare parts.<br />
8) Always ensure that the material to be sanded is firmly<br />
fixed to prevent its movement.<br />
9) Check hose and fittings regularly for wear. Do not carry<br />
the tool by its hose; always be careful to prevent the<br />
tool from being started when carrying the tool with the<br />
air supply connected.<br />
10) Dust can be highly combustible. Vacuum dust collection<br />
bag should be cleaned or replaced daily. Cleaning or<br />
replacing of bag also assures optimum performance.<br />
11) Do not exceed maximum reco<strong>mm</strong>ended air pressure.<br />
Use safety equipment as reco<strong>mm</strong>ended.<br />
12) The tool is not electrically insulated. Do not use where<br />
there is a possibility of coming into contact with live<br />
electricity, gas pipes, water pipes, etc. Check the area<br />
of operation before operation.<br />
13) Take care to avoid entanglement with the moving parts<br />
To Coupler<br />
at or near Tool<br />
To Tool Station<br />
Drain Valve<br />
Drain Leg<br />
Ball Valve<br />
Ball<br />
Valve<br />
of the tool with clothing, ties, hair, cleaning rags, etc. If entangled, it will cause the body<br />
to be pulled towards the work and moving parts of the machine and can be very dangerous.<br />
14) Keep hands clear of the spinning pad during use.<br />
15) If the tool appears to malfunction, remove from use i<strong>mm</strong>ediately and arrange for service<br />
and repair.<br />
16) Do not allow the tool to free speed without taking precautions to protect any persons or<br />
objects from the loss of the abrasive or pad.<br />
Air Hose<br />
Air Compressor<br />
and Tank<br />
Filter<br />
Regulator<br />
Lubricator<br />
Ball Valve<br />
Closed Loop Pipe System<br />
Sloped in the direction of air flow<br />
Air Flow<br />
Air Dryer<br />
5