89717 Iss 1 KM070 English - Lakeland
89717 Iss 1 KM070 English - Lakeland
89717 Iss 1 KM070 English - Lakeland
- No tags were found...

You also want an ePaper? Increase the reach of your titles
YUMPU automatically turns print PDFs into web optimized ePapers that Google loves.
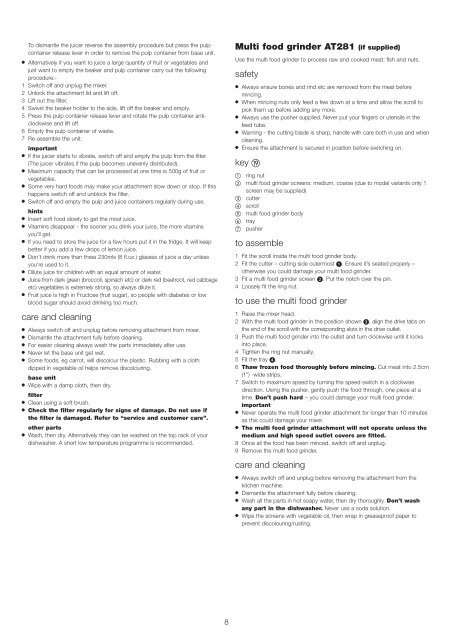
To dismantle the juicer reverse the assembly procedure but press the pulpcontainer release lever in order to remove the pulp container from base unit.● Alternatively if you want to juice a large quantity of fruit or vegetables andjust want to empty the beaker and pulp container carry out the followingprocedure:-1 Switch off and unplug the mixer.2 Unlock the attachment lid and lift off.3 Lift out the filter,4 Swivel the beaker holder to the side, lift off the beaker and empty.5 Press the pulp container release lever and rotate the pulp container anticlockwiseand lift off.6 Empty the pulp container of waste.7 Re-assemble the unit.important● If the juicer starts to vibrate, switch off and empty the pulp from the filter.(The juicer vibrates if the pulp becomes unevenly distributed).● Maximum capacity that can be processed at one time is 500g of fruit orvegetables.● Some very hard foods may make your attachment slow down or stop. If thishappens switch off and unblock the filter.● Switch off and empty the pulp and juice containers regularly during use.hints● Insert soft food slowly to get the most juice.● Vitamins disappear - the sooner you drink your juice, the more vitaminsyou'll get.● If you need to store the juice for a few hours put it in the fridge. It will keepbetter if you add a few drops of lemon juice.● Don't drink more than three 230mls (8 fl.oz.) glasses of juice a day unlessyou're used to it.● Dilute juice for children with an equal amount of water.● Juice from dark green (broccoli, spinach etc) or dark red (beetroot, red cabbageetc) vegetables is extremely strong, so always dilute it.● Fruit juice is high in Fructose (fruit sugar), so people with diabetes or lowblood sugar should avoid drinking too much.care and cleaning● Always switch off and unplug before removing attachment from mixer.● Dismantle the attachment fully before cleaning.● For easier cleaning always wash the parts immediately after use.● Never let the base unit get wet.● Some foods, eg carrot, will discolour the plastic. Rubbing with a clothdipped in vegetable oil helps remove discolouring.base unit● Wipe with a damp cloth, then dry.filter● Clean using a soft brush.● Check the filter regularly for signs of damage. Do not use ifthe filter is damaged. Refer to “service and customer care”.other parts● Wash, then dry. Alternatively they can be washed on the top rack of yourdishwasher. A short low temperature programme is recommended.Multi food grinder AT281 (if supplied)Use the multi food grinder to process raw and cooked meat; fish and nuts.safety● Always ensure bones and rind etc are removed from the meat beforemincing.● When mincing nuts only feed a few down at a time and allow the scroll topick them up before adding any more.● Always use the pusher supplied. Never put your fingers or utensils in thefeed tube.● Warning - the cutting blade is sharp, handle with care both in use and whencleaning.● Ensure the attachment is secured in position before switching on.key ring nut multi food grinder screens: medium, coarse (due to model variants only 1screen may be supplied) cutter scroll multi food grinder body tray pusherto assemble1 Fit the scroll inside the multi food grinder body.2 Fit the cutter – cutting side outermost . Ensure it’s seated properly –otherwise you could damage your multi food grinder.3 Fit a multi food grinder screen . Put the notch over the pin.4 Loosely fit the ring nut.to use the multi food grinder1 Raise the mixer head.2 With the multi food grinder in the position shown , align the drive tabs onthe end of the scroll with the corresponding slots in the drive outlet.3 Push the multi food grinder into the outlet and turn clockwise until it locksinto place.4 Tighten the ring nut manually.5 Fit the tray .6 Thaw frozen food thoroughly before mincing. Cut meat into 2.5cm(1”) -wide strips.7 Switch to maximum speed by turning the speed switch in a clockwisedirection. Using the pusher, gently push the food through, one piece at atime. Don’t push hard – you could damage your multi food grinder.important● Never operate the multi food grinder attachment for longer than 10 minutesas this could damage your mixer.● The multi food grinder attachment will not operate unless themedium and high speed outlet covers are fitted.8 Once all the food has been minced, switch off and unplug.9 Remove the multi food grinder.care and cleaning● Always switch off and unplug before removing the attachment from thekitchen machine.● Dismantle the attachment fully before cleaning.● Wash all the parts in hot soapy water, then dry thoroughly. Don’t washany part in the dishwasher. Never use a soda solution.● Wipe the screens with vegetable oil, then wrap in greaseproof paper toprevent discolouring/rusting.8