Operating Instructions HDD Recorder DMR-HW120 - CCL Computers
Operating Instructions HDD Recorder DMR-HW120 - CCL Computers
Operating Instructions HDD Recorder DMR-HW120 - CCL Computers
You also want an ePaper? Increase the reach of your titles
YUMPU automatically turns print PDFs into web optimized ePapers that Google loves.
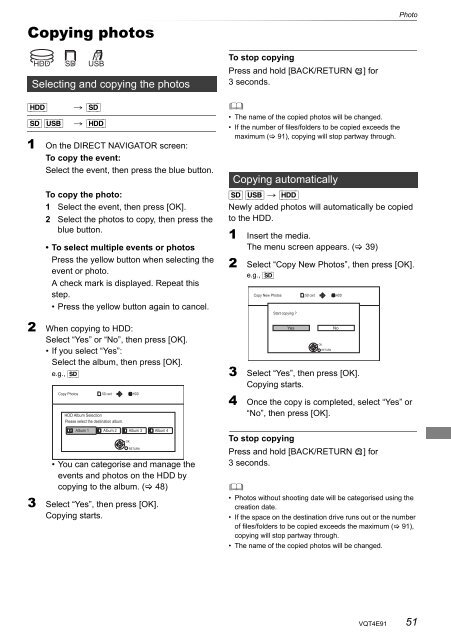
Copying photos<br />
Selecting and copying the photos<br />
[<strong>HDD</strong>] > [SD]<br />
[SD] [USB] > [<strong>HDD</strong>]<br />
1 On the DIRECT NAVIGATOR screen:<br />
To copy the event:<br />
Select the event, then press the blue button.<br />
To copy the photo:<br />
1 Select the event, then press [OK].<br />
2 Select the photos to copy, then press the<br />
blue button.<br />
• To select multiple events or photos<br />
Press the yellow button when selecting the<br />
event or photo.<br />
A check mark is displayed. Repeat this<br />
step.<br />
• Press the yellow button again to cancel.<br />
2 When copying to <strong>HDD</strong>:<br />
Select “Yes” or “No”, then press [OK].<br />
• If you select “Yes”:<br />
Select the album, then press [OK].<br />
e.g., [SD]<br />
Copy Photos SD card<br />
<strong>HDD</strong><br />
<strong>HDD</strong> Album Selection<br />
Please select the destination album.<br />
Album 1 Album 2 Album 3 Album 4<br />
OK<br />
RETURN<br />
• You can categorise and manage the<br />
events and photos on the <strong>HDD</strong> by<br />
copying to the album. ( 48)<br />
3 Select “Yes”, then press [OK].<br />
Copying starts.<br />
To stop copying<br />
Press and hold [BACK/RETURN ] for<br />
3 seconds.<br />
<br />
• The name of the copied photos will be changed.<br />
• If the number of files/folders to be copied exceeds the<br />
maximum ( 91), copying will stop partway through.<br />
Copying automatically<br />
Photo<br />
[SD] [USB] > [<strong>HDD</strong>]<br />
Newly added photos will automatically be copied<br />
to the <strong>HDD</strong>.<br />
1 Insert the media.<br />
The menu screen appears. ( 39)<br />
2 Select “Copy New Photos”, then press [OK].<br />
e.g., [SD]<br />
Copy New Photos<br />
Start copying ?<br />
SD card<br />
Yes No<br />
OK<br />
RETURN<br />
3 Select “Yes”, then press [OK].<br />
Copying starts.<br />
4 Once the copy is completed, select “Yes” or<br />
“No”, then press [OK].<br />
To stop copying<br />
Press and hold [BACK/RETURN ] for<br />
3 seconds.<br />
<br />
• Photos without shooting date will be categorised using the<br />
creation date.<br />
• If the space on the destination drive runs out or the number<br />
of files/folders to be copied exceeds the maximum ( 91),<br />
copying will stop partway through.<br />
• The name of the copied photos will be changed.<br />
<strong>HDD</strong><br />
VQT4E91 51


