Operating Instructions HDD Recorder DMR-HW120 - CCL Computers
Operating Instructions HDD Recorder DMR-HW120 - CCL Computers
Operating Instructions HDD Recorder DMR-HW120 - CCL Computers
Create successful ePaper yourself
Turn your PDF publications into a flip-book with our unique Google optimized e-Paper software.
Convenient functions<br />
Changing the unit’s settings (Setup)<br />
78<br />
RF OUT ( Aerial Signal )<br />
Set whether to output the aerial signal or not<br />
from RF OUT while in standby mode (When<br />
“Power Save in Standby” is activated).<br />
• If “On” is selected, the aerial signal is output<br />
from this unit.<br />
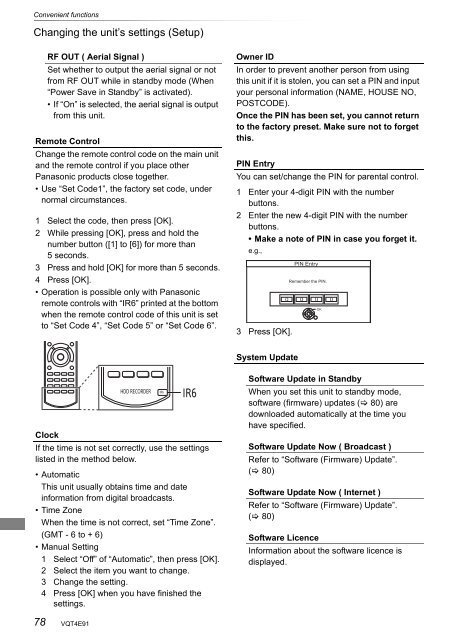
Remote Control<br />
Change the remote control code on the main unit<br />
and the remote control if you place other<br />
Panasonic products close together.<br />
• Use “Set Code1”, the factory set code, under<br />
normal circumstances.<br />
1 Select the code, then press [OK].<br />
2 While pressing [OK], press and hold the<br />
number button ([1] to [6]) for more than<br />
5 seconds.<br />
3 Press and hold [OK] for more than 5 seconds.<br />
4 Press [OK].<br />
• Operation is possible only with Panasonic<br />
remote controls with “IR6” printed at the bottom<br />
when the remote control code of this unit is set<br />
to “Set Code 4”, “Set Code 5” or “Set Code 6”.<br />
Clock<br />
If the time is not set correctly, use the settings<br />
listed in the method below.<br />
• Automatic<br />
This unit usually obtains time and date<br />
information from digital broadcasts.<br />
• Time Zone<br />
When the time is not correct, set “Time Zone”.<br />
(GMT - 6 to + 6)<br />
• Manual Setting<br />
1 Select “Off” of “Automatic”, then press [OK].<br />
2 Select the item you want to change.<br />
3 Change the setting.<br />
4 Press [OK] when you have finished the<br />
settings.<br />
VQT4E91<br />
<strong>HDD</strong> RECORDER IR6 IR6<br />
Owner ID<br />
In order to prevent another person from using<br />
this unit if it is stolen, you can set a PIN and input<br />
your personal information (NAME, HOUSE NO,<br />
POSTCODE).<br />
Once the PIN has been set, you cannot return<br />
to the factory preset. Make sure not to forget<br />
this.<br />
PIN Entry<br />
You can set/change the PIN for parental control.<br />
1 Enter your 4-digit PIN with the number<br />
buttons.<br />
2 Enter the new 4-digit PIN with the number<br />
buttons.<br />
• Make a note of PIN in case you forget it.<br />
e.g.,<br />
3 Press [OK].<br />
System Update<br />
PIN Entry<br />
Remember the PIN.<br />
0 0 0 0<br />
OK<br />
Software Update in Standby<br />
When you set this unit to standby mode,<br />
software (firmware) updates ( 80) are<br />
downloaded automatically at the time you<br />
have specified.<br />
Software Update Now ( Broadcast )<br />
Refer to “Software (Firmware) Update”.<br />
( 80)<br />
Software Update Now ( Internet )<br />
Refer to “Software (Firmware) Update”.<br />
( 80)<br />
Software Licence<br />
Information about the software licence is<br />
displayed.


