

Digital Video Recorder, H.264 Models: DMR-5008/500 (8-Channel ...
Digital Video Recorder, H.264 Models: DMR-5008/500 (8-Channel ...
Digital Video Recorder, H.264 Models: DMR-5008/500 (8-Channel ...

You also want an ePaper? Increase the reach of your titles
YUMPU automatically turns print PDFs into web optimized ePapers that Google loves.
Schedule<br />
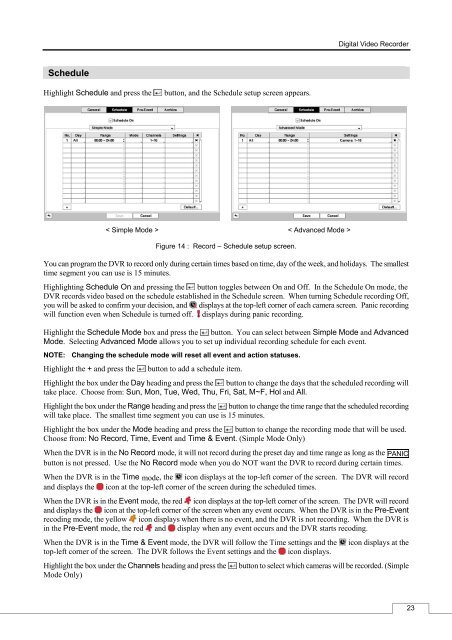
Highlight Schedule and press the button, and the Schedule setup screen appears.<br />
< Simple Mode ><br />
Figure 14 : Record – Schedule setup screen.<br />
< Advanced Mode ><br />
<strong>Digital</strong> <strong>Video</strong> <strong>Recorder</strong><br />
You can program the DVR to record only during certain times based on time, day of the week, and holidays. The smallest<br />
time segment you can use is 15 minutes.<br />
Highlighting Schedule On and pressing the button toggles between On and Off. In the Schedule On mode, the<br />
DVR records video based on the schedule established in the Schedule screen. When turning Schedule recording Off,<br />
you will be asked to confirm your decision, and displays at the top-left corner of each camera screen. Panic recording<br />
will function even when Schedule is turned off. displays during panic recording.<br />
Highlight the Schedule Mode box and press the button. You can select between Simple Mode and Advanced<br />
Mode. Selecting Advanced Mode allows you to set up individual recording schedule for each event.<br />
NOTE: Changing the schedule mode will reset all event and action statuses.<br />
Highlight the + and press the button to add a schedule item.<br />
Highlight the box under the Day heading and press the button to change the days that the scheduled recording will<br />
take place. Choose from: Sun, Mon, Tue, Wed, Thu, Fri, Sat, M~F, Hol and All.<br />
Highlight the box under the Range heading and press the button to change the time range that the scheduled recording<br />
will take place. The smallest time segment you can use is 15 minutes.<br />
Highlight the box under the Mode heading and press the button to change the recording mode that will be used.<br />
Choose from: No Record, Time, Event and Time & Event. (Simple Mode Only)<br />
When the DVR is in the No Record mode, it will not record during the preset day and time range as long as the PANIC<br />
button is not pressed. Use the No Record mode when you do NOT want the DVR to record during certain times.<br />
When the DVR is in the Time mode, the icon displays at the top-left corner of the screen. The DVR will record<br />
and displays the icon at the top-left corner of the screen during the scheduled times.<br />
When the DVR is in the Event mode, the red icon displays at the top-left corner of the screen. The DVR will record<br />
and displays the icon at the top-left corner of the screen when any event occurs. When the DVR is in the Pre-Event<br />
recoding mode, the yellow icon displays when there is no event, and the DVR is not recording. When the DVR is<br />
in the Pre-Event mode, the red and display when any event occurs and the DVR starts recoding.<br />
When the DVR is in the Time & Event mode, the DVR will follow the Time settings and the icon displays at the<br />
top-left corner of the screen. The DVR follows the Event settings and the icon displays.<br />
Highlight the box under the <strong>Channel</strong>s heading and press the button to select which cameras will be recorded. (Simple<br />
Mode Only)<br />
23


