

Digital Video Recorder, H.264 Models: DMR-5008/500 (8-Channel ...
Digital Video Recorder, H.264 Models: DMR-5008/500 (8-Channel ...
Digital Video Recorder, H.264 Models: DMR-5008/500 (8-Channel ...

You also want an ePaper? Increase the reach of your titles
YUMPU automatically turns print PDFs into web optimized ePapers that Google loves.
42<br />
User’s Manual<br />
Primary Monitor<br />
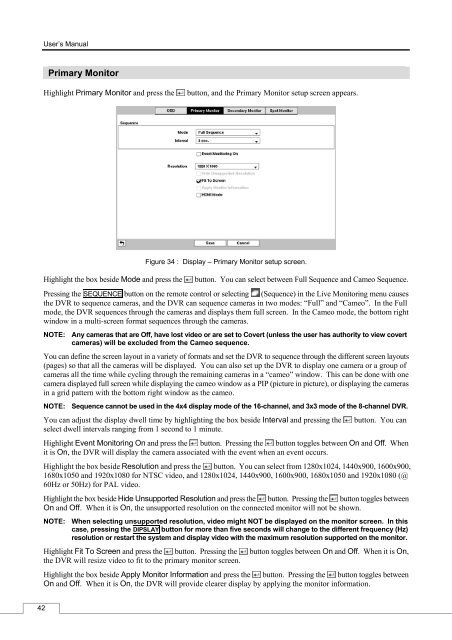
Highlight Primary Monitor and press the button, and the Primary Monitor setup screen appears.<br />
Figure 34 : Display – Primary Monitor setup screen.<br />
Highlight the box beside Mode and press the button. You can select between Full Sequence and Cameo Sequence.<br />
Pressing the SEQUENCE button on the remote control or selecting (Sequence) in the Live Monitoring menu causes<br />
the DVR to sequence cameras, and the DVR can sequence cameras in two modes: “Full” and “Cameo”. In the Full<br />
mode, the DVR sequences through the cameras and displays them full screen. In the Cameo mode, the bottom right<br />
window in a multi-screen format sequences through the cameras.<br />
NOTE: Any cameras that are Off, have lost video or are set to Covert (unless the user has authority to view covert<br />
cameras) will be excluded from the Cameo sequence.<br />
You can define the screen layout in a variety of formats and set the DVR to sequence through the different screen layouts<br />
(pages) so that all the cameras will be displayed. You can also set up the DVR to display one camera or a group of<br />
cameras all the time while cycling through the remaining cameras in a “cameo” window. This can be done with one<br />
camera displayed full screen while displaying the cameo window as a PIP (picture in picture), or displaying the cameras<br />
in a grid pattern with the bottom right window as the cameo.<br />
NOTE: Sequence cannot be used in the 4x4 display mode of the 16-channel, and 3x3 mode of the 8-channel DVR.<br />
You can adjust the display dwell time by highlighting the box beside Interval and pressing the button. You can<br />
select dwell intervals ranging from 1 second to 1 minute.<br />
Highlight Event Monitoring On and press the button. Pressing the button toggles between On and Off. When<br />
it is On, the DVR will display the camera associated with the event when an event occurs.<br />
Highlight the box beside Resolution and press the button. You can select from 1280x1024, 1440x900, 1600x900,<br />
1680x1050 and 1920x1080 for NTSC video, and 1280x1024, 1440x900, 1600x900, 1680x1050 and 1920x1080 (@<br />
60Hz or 50Hz) for PAL video.<br />
Highlight the box beside Hide Unsupported Resolution and press the button. Pressing the button toggles between<br />
On and Off. When it is On, the unsupported resolution on the connected monitor will not be shown.<br />
NOTE: When selecting unsupported resolution, video might NOT be displayed on the monitor screen. In this<br />
case, pressing the DIPSLAY button for more than five seconds will change to the different frequency (Hz)<br />
resolution or restart the system and display video with the maximum resolution supported on the monitor.<br />
Highlight Fit To Screen and press the button. Pressing the button toggles between On and Off. When it is On,<br />
the DVR will resize video to fit to the primary monitor screen.<br />
Highlight the box beside Apply Monitor Information and press the button. Pressing the button toggles between<br />
On and Off. When it is On, the DVR will provide clearer display by applying the monitor information.


