Digital Video Recorder, H.264 Models: DMR-5008/500 (8-Channel ...
Digital Video Recorder, H.264 Models: DMR-5008/500 (8-Channel ...
Digital Video Recorder, H.264 Models: DMR-5008/500 (8-Channel ...
You also want an ePaper? Increase the reach of your titles
YUMPU automatically turns print PDFs into web optimized ePapers that Google loves.
<strong>Digital</strong> <strong>Video</strong> <strong>Recorder</strong><br />
You can search video from the first to last recorded images, or you can set the start and stop times and dates.<br />
Highlight the box beside From and press the button to toggle between On and Off. When set to Off, you can enter<br />
a specific Date and Time. When set to On, the search will be from the first recorded image.<br />
Highlight the box beside To and press the button to toggle between On and Off. When set to Off, you can enter a<br />
specific Date and Time. When set to On, the search will be from the last recorded image.<br />
Highlight the box beside Check Time Overlap and press the button. It toggles between On and Off. You will only<br />
be able to turn the Check Time Overlap on or off if a user-defined date and time is set to From and To. If the DVR’s<br />
date and time have been reset, it is possible for the DVR to have more than one overlapping start and stop time. When<br />
set to On, you will be asked to select one of the overlapping start and stop time. When set to Off, the DVR will display<br />
search results from all start times to all stop times.<br />
Highlight the box beside Alarm-In and press the button. You can select the alarm inputs that you want to include<br />
in your search.<br />
Highlight the box beside Motion and press the button. You can select the cameras for which you want any reports<br />
of motion detection.<br />
Highlight the box beside <strong>Video</strong> Loss and press the button. You can select the cameras for which you want any<br />
reports of lost video.<br />
Highlight the box beside <strong>Video</strong> Blind and press the button. You can select the cameras for which you want any<br />
reports of blind video.<br />
Highlight the box beside Text-In and press the button. You can select the text-in devices which you want any reports<br />
of text input.<br />
Highlight the box beside Record <strong>Channel</strong>s and press the button. You can select the cameras that you want to search<br />
for any reports of event recorded data. The DVR will display the events (not the camera channels) that occurred and<br />
that also are recorded on the camera channel that you selected. If you do not select a camera channel in this field, the<br />
DVR will search events that are not associated with cameras.<br />
You can also toggle On and Off self-diagnostic System Events as part of your search. The choices are:<br />
Panic Record<br />
Check Recording<br />
Check Alarm-In<br />
Disk Almost Full<br />
Disk Bad<br />
Disk Temperature<br />
Disk S.M.A.R.T.<br />
Fan Error<br />
Once you set your desired search conditions, highlight Search and press the button to display the search results in<br />
the Event Log Search screen. Selecting Cancel exits the screen without saving the changes.<br />
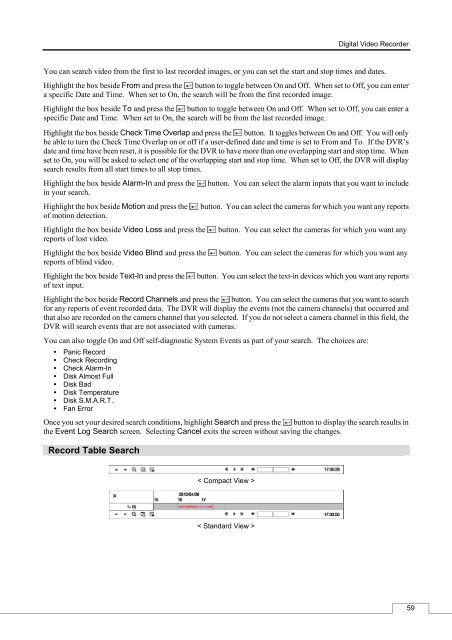
Record Table Search<br />
< Compact View ><br />
< Standard View ><br />
59


