

Digital Video Recorder, H.264 Models: DMR-5008/500 (8-Channel ...
Digital Video Recorder, H.264 Models: DMR-5008/500 (8-Channel ...
Digital Video Recorder, H.264 Models: DMR-5008/500 (8-Channel ...

You also want an ePaper? Increase the reach of your titles
YUMPU automatically turns print PDFs into web optimized ePapers that Google loves.
28<br />
User’s Manual<br />
Highlight the box beside DNS Server. Press the Up and Down arrow buttons to set the IP address of the DNS server.<br />
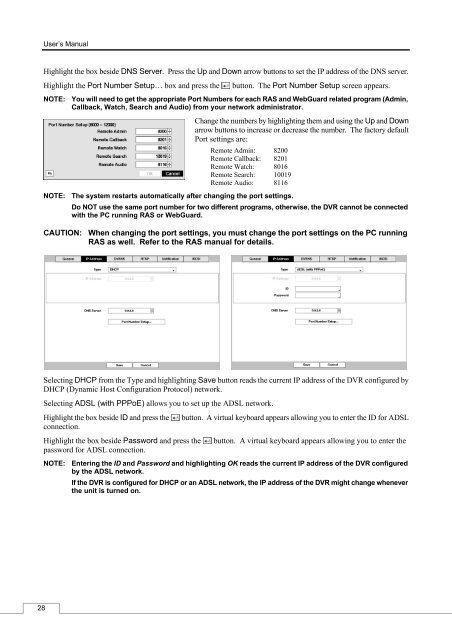
Highlight the Port Number Setup… box and press the button. The Port Number Setup screen appears.<br />
NOTE: You will need to get the appropriate Port Numbers for each RAS and WebGuard related program (Admin,<br />
Callback, Watch, Search and Audio) from your network administrator.<br />
NOTE: The system restarts automatically after changing the port settings.<br />
Change the numbers by highlighting them and using the Up and Down<br />
arrow buttons to increase or decrease the number. The factory default<br />
Port settings are:<br />
Remote Admin: 8200<br />
Remote Callback: 8201<br />
Remote Watch: 8016<br />
Remote Search: 10019<br />
Remote Audio: 8116<br />
Do NOT use the same port number for two different programs, otherwise, the DVR cannot be connected<br />
with the PC running RAS or WebGuard.<br />
CAUTION: When changing the port settings, you must change the port settings on the PC running<br />
RAS as well. Refer to the RAS manual for details.<br />
Selecting DHCP from the Type and highlighting Save button reads the current IP address of the DVR configured by<br />
DHCP (Dynamic Host Configuration Protocol) network.<br />
Selecting ADSL (with PPPoE) allows you to set up the ADSL network.<br />
Highlight the box beside ID and press the button. A virtual keyboard appears allowing you to enter the ID for ADSL<br />
connection.<br />
Highlight the box beside Password and press the button. A virtual keyboard appears allowing you to enter the<br />
password for ADSL connection.<br />
NOTE: Entering the ID and Password and highlighting OK reads the current IP address of the DVR configured<br />
by the ADSL network.<br />
If the DVR is configured for DHCP or an ADSL network, the IP address of the DVR might change whenever<br />
the unit is turned on.


