- Page 1 and 2: SUSE Linux 10.1 April 07, 2006 Star
- Page 3 and 4: Contents About This Guide vii Part
- Page 5: 6 Customizing Your KDE Desktop 165
- Page 8 and 9: viii Start-Up SUSE Linux Reference
- Page 11: Part I. Setup
- Page 14 and 15: 4 Start-Up 2 Reboot the system. 3 A
- Page 16 and 17: 6 Start-Up Use the function keys in
- Page 18 and 19: 8 Start-Up dows but does not provid
- Page 20 and 21: 10 Start-Up The partitions to creat
- Page 22 and 23: 12 Start-Up Figure 1.2 Possible Opt
- Page 24 and 25: 14 Start-Up The first bar graph sho
- Page 26 and 27: 16 Start-Up Other Filters Click the
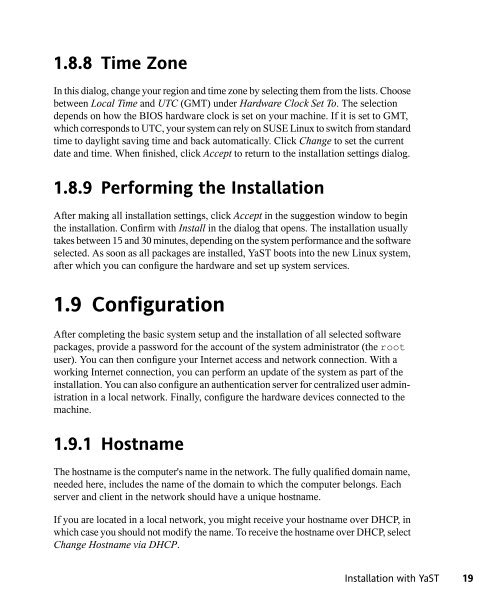
- Page 30 and 31: 20 Start-Up 1.9.2 root Password roo
- Page 32 and 33: 22 Start-Up If you have multiple ne
- Page 34 and 35: 24 Start-Up Figure 1.5 Entering the
- Page 36 and 37: 26 Start-Up settings. LDAP client c
- Page 38 and 39: 28 Start-Up AutoYaST is a system fo
- Page 40 and 41: 30 Start-Up To start YaST in text m
- Page 42 and 43: 32 Start-Up Figure 2.2 YaST Package
- Page 44 and 45: 34 Start-Up NOTE Because language-s
- Page 46 and 47: 36 Start-Up Installation Summary Af
- Page 48 and 49: 38 Start-Up Figure 2.3 Conflict Man
- Page 50 and 51: 40 Start-Up Find the list of availa
- Page 52 and 53: 42 Start-Up Backup During the updat
- Page 54 and 55: 44 Start-Up 2.4.2 Infrared Device C
- Page 56 and 57: 46 Start-Up satisfied with the sett
- Page 58 and 59: 48 Start-Up is provided at http://c
- Page 60 and 61: 50 Start-Up If YaST is unable to de
- Page 62 and 63: 52 Start-Up Standard Boot Floppy Us
- Page 64 and 65: 54 Start-Up point of the hard disks
- Page 66 and 67: 56 Start-Up If you partition manual
- Page 68 and 69: 58 Start-Up To edit a PCI ID, selec
- Page 70 and 71: 60 Start-Up Figure 2.5 Setting the
- Page 72 and 73: 62 Start-Up 2.7.1 Mail Transfer Age
- Page 74 and 75: 64 Start-Up LDAP Client If using LD
- Page 76 and 77: 66 Start-Up The YaST Remote Adminis
- Page 78 and 79:
68 Start-Up 2.9.2 Group Management
- Page 80 and 81:
70 Start-Up the options Current Dir
- Page 82 and 83:
72 Start-Up /proc/iomem This displa
- Page 84 and 85:
74 Start-Up Press Enter to start th
- Page 86 and 87:
2.11.3 Starting the Individual Modu
- Page 88 and 89:
78 Start-Up superuser Permits all r
- Page 90 and 91:
80 Start-Up Figure 2.8 Card and Mon
- Page 92 and 93:
82 Start-Up The tabs in the row at
- Page 94 and 95:
84 Start-Up Activate 3-Button Emula
- Page 96 and 97:
86 Start-Up 2.14 Troubleshooting Al
- Page 99 and 100:
Working with the Shell When booting
- Page 101 and 102:
IMPORTANT: No News Is Good News The
- Page 103 and 104:
3.1.2 Linux Directory Structure Bec
- Page 105 and 106:
in Programs needed early in the boo
- Page 107 and 108:
directory where you ran the command
- Page 109 and 110:
and paths with the help of →| , y
- Page 111 and 112:
sponding command. Both standard out
- Page 113 and 114:
such as installing new programs, ar
- Page 115 and 116:
3.2.2 Modifying File Permissions Ch
- Page 117 and 118:
3.3.1 File Commands The following s
- Page 119 and 120:
u g o User Group Others For access,
- Page 121 and 122:
locate patterns This command is onl
- Page 123 and 124:
-t filesystem Specify the file syst
- Page 125 and 126:
ps [options] [process ID] If run wi
- Page 127 and 128:
eboot [options] Does the same as ha
- Page 129 and 130:
H J K L Move one character to the l
- Page 131:
• A number of vim sources are ava
- Page 134 and 135:
124 Start-Up configuration of the s
- Page 136 and 137:
Figure 4.3 Generating a Search Inde
- Page 138 and 139:
128 Start-Up Another possibility to
- Page 140 and 141:
130 Start-Up 4.7 Package Documentat
- Page 142 and 143:
132 Start-Up concentrates on standa
- Page 145:
Part III. Desktop
- Page 148 and 149:
138 Start-Up boot. In this case, yo
- Page 150 and 151:
140 Start-Up main menu. Alter a sho
- Page 152 and 153:
142 Start-Up structure for accessin
- Page 154 and 155:
144 Start-Up Figure 5.3 Main Menu S
- Page 156 and 157:
146 Start-Up topmost directory is r
- Page 158 and 159:
148 Start-Up • Select the object
- Page 160 and 161:
150 Start-Up The group determines t
- Page 162 and 163:
152 Start-Up 4 Specify the folder t
- Page 164 and 165:
154 Start-Up where you want the tex
- Page 166 and 167:
156 Start-Up network passwords and
- Page 168 and 169:
158 Start-Up Figure 5.8 Ark: File A
- Page 170 and 171:
160 Start-Up Start KJobViewer from
- Page 172 and 173:
162 Start-Up filename for the image
- Page 174 and 175:
164 Start-Up To update system fonts
- Page 176 and 177:
166 Start-Up 5 Apply your changes a
- Page 178 and 179:
168 Start-Up In the Icons section,
- Page 180 and 181:
170 Start-Up shortcuts. For more in
- Page 182 and 183:
172 Start-Up The Country/Region & L
- Page 184 and 185:
174 Start-Up Login Manager configur
- Page 186 and 187:
176 Start-Up The program managing t
- Page 188 and 189:
178 Start-Up 7.2 Logging Out When y
- Page 190 and 191:
180 Start-Up To remove an icon from
- Page 192 and 193:
182 Start-Up The Places Menu The Pl
- Page 194 and 195:
184 Start-Up From the Desktop Doubl
- Page 196 and 197:
186 Start-Up Figure 7.4 Nautilus St
- Page 198 and 199:
188 Start-Up 3 Click Add to search
- Page 200 and 201:
190 Start-Up For a more in-depth in
- Page 202 and 203:
192 Start-Up Option Date Modified L
- Page 204 and 205:
194 Start-Up To open a file display
- Page 206 and 207:
196 Start-Up Left-click the panel i
- Page 208 and 209:
198 Start-Up account, open a file d
- Page 210 and 211:
200 Start-Up To add a new channel,
- Page 212 and 213:
202 Start-Up 8.1 Hardware Settings
- Page 214 and 215:
204 Start-Up 8.2.3 Configuring the
- Page 216 and 217:
206 Start-Up 8.3.1 Configuring Acce
- Page 218 and 219:
208 Start-Up 8.4.3 Managing Session
- Page 221:
Part IV. Troubleshooting
- Page 224 and 225:
214 Start-Up Log File /var/log/SaX.
- Page 226 and 227:
216 Start-Up 1. The program checks
- Page 228 and 229:
Procedure 9.2 Changing the Boot Seq
- Page 230 and 231:
220 Start-Up acpi=off This paramete
- Page 232 and 233:
222 Start-Up and port number under
- Page 234 and 235:
224 Start-Up 7 Once in the YaST Sys
- Page 236 and 237:
226 Start-Up • DNS is not working
- Page 238 and 239:
228 Start-Up 5 If graphical login s
- Page 240 and 241:
230 Start-Up 9.4.3 Login Successful
- Page 242 and 243:
232 Start-Up IMPORTANT If the user'
- Page 244 and 245:
234 Start-Up assume both server and
- Page 246 and 247:
236 Start-Up use traceroute fully_q
- Page 248 and 249:
238 Start-Up 9.6.2 Restoring a Syst
- Page 250 and 251:
240 Start-Up 1 Boot the system with
- Page 252 and 253:
242 Start-Up Clicking Next starts a
- Page 254 and 255:
244 Start-Up tion support for regis
- Page 256 and 257:
246 Start-Up • France: Phone: +33
- Page 258 and 259:
248 Start-Up We endeavor to help yo
- Page 260 and 261:
ping, 115 ps, 115 reboot, 117 rm, 1
- Page 262 and 263:
utilities, 195-200 grep, 112 groups
- Page 264 and 265:
S Samba clients, 66 servers, 66 SaX
- Page 266:
servers, 66 Samba clients, 26 scann


