


You also want an ePaper? Increase the reach of your titles
YUMPU automatically turns print PDFs into web optimized ePapers that Google loves.
CHAPTER SIX<br />
- -- -<br />
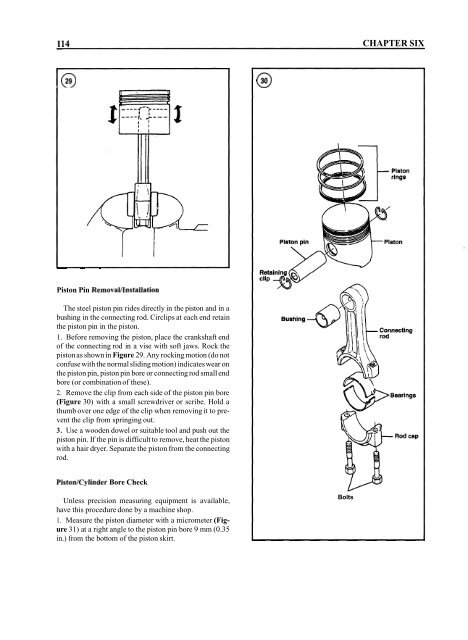
Piston Pin RemovaUInstallation<br />
The steel piston pin rides directly in the piston and in a<br />
bushing in the connecting rod. Circlips at each end retain<br />
the piston pin in the piston.<br />
1. Before removing the piston, place the crankshaft end<br />
of the connecting rod in a vise with soft jaws. Rock the<br />
piston as shown in Figure 29. Any rocking motion (do not<br />
confuse with the normal sliding motion) indicates wear on<br />
the piston pin, piston pin bore or connecting rod small end<br />
bore (or combination of these).<br />
2. Remove the clip from each side of the piston pin bore<br />
(Figure 30) with a small screwdriver or scribe. Hold a<br />
thumb over one edge of the clip when removing it to prevent<br />
the clip from springing out.<br />
3. Use a wooden dowel or suitable tool and push out the<br />
piston pin. If the pin is difficult to remove, heat the piston<br />
with a hair dryer. Separate the piston from the connecting<br />
rod.<br />
PistonICylinder Bore Check<br />
Unless precision measuring equipment is available,<br />
have this procedure done by a machine shop.<br />
1. Measure the piston diameter with a micrometer (Figure<br />
31) at a right angle to the piston pin bore 9 mm (0.35<br />
in.) from the bottom of the piston skirt.<br />
Bolts


