


Create successful ePaper yourself
Turn your PDF publications into a flip-book with our unique Google optimized e-Paper software.
54 CHAPTER THREE<br />
Freshwater (Closed) Cooling Systems<br />
Inspection<br />
WARNING<br />
When performing any service work on the<br />
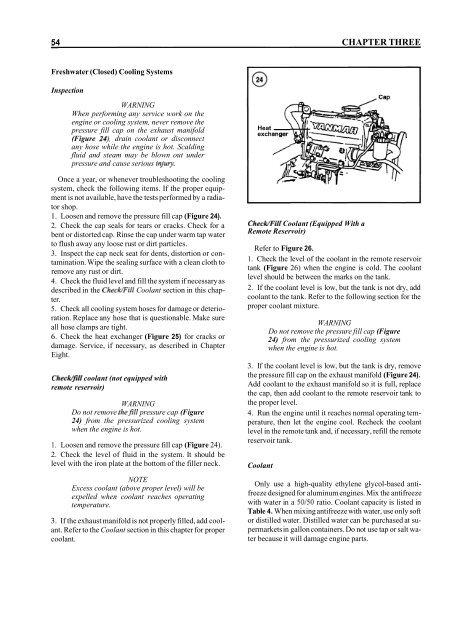
engine or cooling system, never remove the<br />
pressure fill cap on the exhaust manifold<br />
(Figure 24), drain coolant or disconnect<br />
any hose while the engine is hot. Scalding<br />
fluid and steam may be blown out under<br />
pressure and cause serious injuly.<br />
Once a year, or whenever troubleshooting the cooling<br />
system, check the following items. If the proper equipment<br />
is not available, have the tests performed by a radiator<br />
shop.<br />
1. Loosen and remove the pressure fill cap (Figure 24).<br />
2. Check the cap seals for tears or cracks. Check for a<br />
bent or distorted cap. Rinse the cap under warm tap water<br />
to flush away any loose rust or dirt particles.<br />
3. Inspect the cap neck seat for dents, distortion or contamination.<br />
Wipe the sealing surface with a clean cloth to<br />
remove any rust or dirt.<br />
4. Check the fluid level and fill the system if necessary as<br />
described in the ChecWFill Coolant section in this chapter.<br />
5. Check all cooling system hoses for damage or deterioration.<br />
Replace any hose that is questionable. Make sure<br />
all hose clamps are tight.<br />
6. Check the heat exchanger (Figure 25) for cracks or<br />
damage. Service, if necessary, as described in Chapter<br />
Eight.<br />
ChecWfill coolant (not equipped with<br />
remote reservoir)<br />
WARNING<br />
Do not remove thefill pressure cap (Figure<br />
24) from the pressurized cooling system<br />
when the engine is hot.<br />
1. Loosen and remove the pressure fill cap (Figure 24).<br />
2. Check the level of fluid in the system. It should be<br />
level with the iron plate at the bottom of the filler neck.<br />
NOTE<br />
Excess coolant (above proper level) will be<br />
expelled when coolant reaches operating<br />
temperature.<br />
3. If the exhaust manifold is not properly filled, add coolant.<br />
Refer to the Coolant section in this chapter for proper<br />
coolant.<br />
Heat<br />
exch<br />
ChecWFill Coolant (Equipped With a<br />
Remote Reservoir)<br />
Refer to Figure 26.<br />
1. Check the level of the coolant in the remote reservoir<br />
tank (Figure 26) when the engine is cold. The coolant<br />
level should be between the marks on the tank.<br />
2. If the coolant level is low, but the tank is not dry, add<br />
coolant to the tank. Refer to the following section for the<br />
proper coolant mixture.<br />
WARNING<br />
Do not remove the pressure fill cap (Figure<br />
24) from the pressurized cooling system<br />
when the engine is hot.<br />
3. If the coolant level is low, but the tank is dry, remove<br />
the pressure fill cap on the exhaust manifold (Figure 24).<br />
Add coolant to the exhaust manifold so it is full, replace<br />
the cap, then add coolant to the remote reservoir tank to<br />
the proper level.<br />
4. Run the engine until it reaches normal operating temperature,<br />
then let the engine cool. Recheck the coolant<br />
level in the remote tank and, if necessary, refill the remote<br />
reservoir tank.<br />
Coolant<br />
Only use a high-quality ethylene glycol-based antifreeze<br />
designed for aluminum engines. Mix the antifreeze<br />
with water in a 50150 ratio. Coolant capacity is listed in<br />
Table 4. When mixing antifreeze with water, use only soft<br />
or distilled water. Distilled water can be purchased at supermarkets<br />
in gallon containers. Do not use tap or salt water<br />
because it will damage engine parts.


