Surgivet® V1030 Hand-Held Pulse Oximeter
Surgivet® V1030 Hand-Held Pulse Oximeter
Surgivet® V1030 Hand-Held Pulse Oximeter

You also want an ePaper? Increase the reach of your titles
YUMPU automatically turns print PDFs into web optimized ePapers that Google loves.
Chapter 4: Operating Instructions<br />
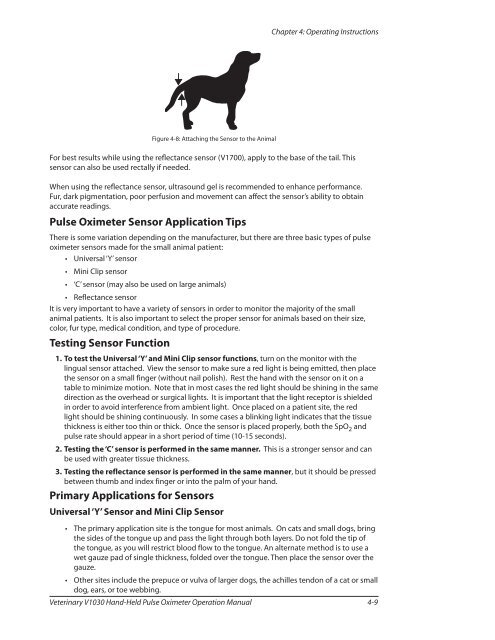
Figure 4-8: Attaching the Sensor to the Animal<br />
For best results while using the reflectance sensor (V1700), apply to the base of the tail. This<br />
sensor can also be used rectally if needed.<br />
When using the reflectance sensor, ultrasound gel is recommended to enhance performance.<br />
Fur, dark pigmentation, poor perfusion and movement can affect the sensor’s ability to obtain<br />
accurate readings.<br />
<strong>Pulse</strong> <strong>Oximeter</strong> Sensor Application Tips<br />
There is some variation depending on the manufacturer, but there are three basic types of pulse<br />
oximeter sensors made for the small animal patient:<br />
• Universal ‘Y’ sensor<br />
• Mini Clip sensor<br />
• ‘C’ sensor (may also be used on large animals)<br />
• Reflectance sensor<br />
It is very important to have a variety of sensors in order to monitor the majority of the small<br />
animal patients. It is also important to select the proper sensor for animals based on their size,<br />
color, fur type, medical condition, and type of procedure.<br />
Testing Sensor Function<br />
1. To test the Universal ‘Y’ and Mini Clip sensor functions, turn on the monitor with the<br />
lingual sensor attached. View the sensor to make sure a red light is being emitted, then place<br />
the sensor on a small finger (without nail polish). Rest the hand with the sensor on it on a<br />
table to minimize motion. Note that in most cases the red light should be shining in the same<br />
direction as the overhead or surgical lights. It is important that the light receptor is shielded<br />
in order to avoid interference from ambient light. Once placed on a patient site, the red<br />
light should be shining continuously. In some cases a blinking light indicates that the tissue<br />
thickness is either too thin or thick. Once the sensor is placed properly, both the SpO 2 and<br />
pulse rate should appear in a short period of time (10-15 seconds).<br />
2. Testing the ‘C’ sensor is performed in the same manner. This is a stronger sensor and can<br />
be used with greater tissue thickness.<br />
3. Testing the reflectance sensor is performed in the same manner, but it should be pressed<br />
between thumb and index finger or into the palm of your hand.<br />
Primary Applications for Sensors<br />
Universal ‘Y’ Sensor and Mini Clip Sensor<br />
• The primary application site is the tongue for most animals. On cats and small dogs, bring<br />
the sides of the tongue up and pass the light through both layers. Do not fold the tip of<br />
the tongue, as you will restrict blood flow to the tongue. An alternate method is to use a<br />
wet gauze pad of single thickness, folded over the tongue. Then place the sensor over the<br />
gauze.<br />
• Other sites include the prepuce or vulva of larger dogs, the achilles tendon of a cat or small<br />
dog, ears, or toe webbing.<br />
Veterinary <strong>V1030</strong> <strong>Hand</strong>-<strong>Held</strong> <strong>Pulse</strong> <strong>Oximeter</strong> Operation Manual 4-9


![Redemption Form [PDF] - SurgiVet](https://img.yumpu.com/37386077/1/190x245/redemption-form-pdf-surgivet.jpg?quality=85)
![Redemption Form [PDF] - SurgiVet](https://img.yumpu.com/37386066/1/190x245/redemption-form-pdf-surgivet.jpg?quality=85)