Computrac MAX-1000 User's Manual - Arizona Instrument
Computrac MAX-1000 User's Manual - Arizona Instrument
Computrac MAX-1000 User's Manual - Arizona Instrument

You also want an ePaper? Increase the reach of your titles
YUMPU automatically turns print PDFs into web optimized ePapers that Google loves.
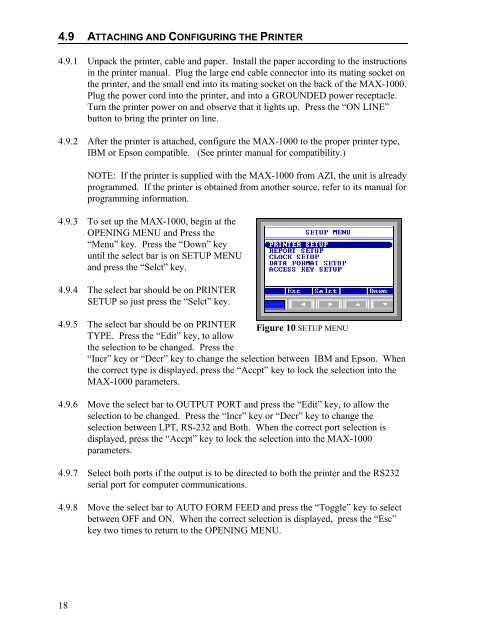
4.9 ATTACHING AND CONFIGURING THE PRINTER4.9.1 Unpack the printer, cable and paper. Install the paper according to the instructionsin the printer manual. Plug the large end cable connector into its mating socket onthe printer, and the small end into its mating socket on the back of the <strong>MAX</strong>-<strong>1000</strong>.Plug the power cord into the printer, and into a GROUNDED power receptacle.Turn the printer power on and observe that it lights up. Press the “ON LINE”button to bring the printer on line.4.9.2 After the printer is attached, configure the <strong>MAX</strong>-<strong>1000</strong> to the proper printer type,IBM or Epson compatible. (See printer manual for compatibility.)NOTE: If the printer is supplied with the <strong>MAX</strong>-<strong>1000</strong> from AZI, the unit is alreadyprogrammed. If the printer is obtained from another source, refer to its manual forprogramming information.4.9.3 To set up the <strong>MAX</strong>-<strong>1000</strong>, begin at theOPENING MENU and Press the“Menu” key. Press the “Down” keyuntil the select bar is on SETUP MENUand press the “Selct” key.4.9.4 The select bar should be on PRINTERSETUP so just press the “Selct” key.4.9.5 The select bar should be on PRINTER Figure 10 SETUP MENUTYPE. Press the “Edit” key, to allowthe selection to be changed. Press the“Incr” key or “Decr” key to change the selection between IBM and Epson. Whenthe correct type is displayed, press the “Accpt” key to lock the selection into the<strong>MAX</strong>-<strong>1000</strong> parameters.4.9.6 Move the select bar to OUTPUT PORT and press the “Edit” key, to allow theselection to be changed. Press the “Incr” key or “Decr” key to change theselection between LPT, RS-232 and Both. When the correct port selection isdisplayed, press the “Accpt” key to lock the selection into the <strong>MAX</strong>-<strong>1000</strong>parameters.4.9.7 Select both ports if the output is to be directed to both the printer and the RS232serial port for computer communications.4.9.8 Move the select bar to AUTO FORM FEED and press the “Toggle” key to selectbetween OFF and ON. When the correct selection is displayed, press the “Esc”key two times to return to the OPENING MENU.18