Tecnai on-line help manual -- Alignments - UT Southwestern
Tecnai on-line help manual -- Alignments - UT Southwestern
Tecnai on-line help manual -- Alignments - UT Southwestern
- No tags were found...
Create successful ePaper yourself
Turn your PDF publications into a flip-book with our unique Google optimized e-Paper software.
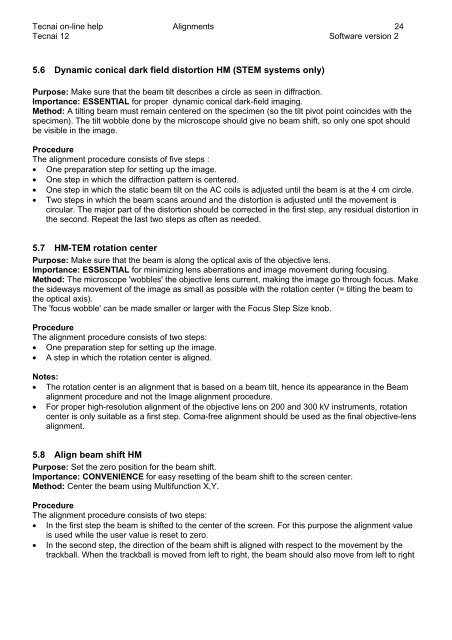
<str<strong>on</strong>g>Tecnai</str<strong>on</strong>g> <strong>on</strong>-<strong>line</strong> <strong>help</strong> <strong>Alignments</strong> 24<str<strong>on</strong>g>Tecnai</str<strong>on</strong>g> 12 Software versi<strong>on</strong> 25.6 Dynamic c<strong>on</strong>ical dark field distorti<strong>on</strong> HM (STEM systems <strong>on</strong>ly)Purpose: Make sure that the beam tilt describes a circle as seen in diffracti<strong>on</strong>.Importance: ESSENTIAL for proper dynamic c<strong>on</strong>ical dark-field imaging.Method: A tilting beam must remain centered <strong>on</strong> the specimen (so the tilt pivot point coincides with thespecimen). The tilt wobble d<strong>on</strong>e by the microscope should give no beam shift, so <strong>on</strong>ly <strong>on</strong>e spot shouldbe visible in the image.ProcedureThe alignment procedure c<strong>on</strong>sists of five steps :• One preparati<strong>on</strong> step for setting up the image.• One step in which the diffracti<strong>on</strong> pattern is centered.• One step in which the static beam tilt <strong>on</strong> the AC coils is adjusted until the beam is at the 4 cm circle.• Two steps in which the beam scans around and the distorti<strong>on</strong> is adjusted until the movement iscircular. The major part of the distorti<strong>on</strong> should be corrected in the first step, any residual distorti<strong>on</strong> inthe sec<strong>on</strong>d. Repeat the last two steps as often as needed.5.7 HM-TEM rotati<strong>on</strong> centerPurpose: Make sure that the beam is al<strong>on</strong>g the optical axis of the objective lens.Importance: ESSENTIAL for minimizing lens aberrati<strong>on</strong>s and image movement during focusing.Method: The microscope 'wobbles' the objective lens current, making the image go through focus. Makethe sideways movement of the image as small as possible with the rotati<strong>on</strong> center (= tilting the beam tothe optical axis).The 'focus wobble' can be made smaller or larger with the Focus Step Size knob.ProcedureThe alignment procedure c<strong>on</strong>sists of two steps:• One preparati<strong>on</strong> step for setting up the image.• A step in which the rotati<strong>on</strong> center is aligned.Notes:• The rotati<strong>on</strong> center is an alignment that is based <strong>on</strong> a beam tilt, hence its appearance in the Beamalignment procedure and not the Image alignment procedure.• For proper high-resoluti<strong>on</strong> alignment of the objective lens <strong>on</strong> 200 and 300 kV instruments, rotati<strong>on</strong>center is <strong>on</strong>ly suitable as a first step. Coma-free alignment should be used as the final objective-lensalignment.5.8 Align beam shift HMPurpose: Set the zero positi<strong>on</strong> for the beam shift.Importance: CONVENIENCE for easy resetting of the beam shift to the screen center.Method: Center the beam using Multifuncti<strong>on</strong> X,Y.ProcedureThe alignment procedure c<strong>on</strong>sists of two steps:• In the first step the beam is shifted to the center of the screen. For this purpose the alignment valueis used while the user value is reset to zero.• In the sec<strong>on</strong>d step, the directi<strong>on</strong> of the beam shift is aligned with respect to the movement by thetrackball. When the trackball is moved from left to right, the beam should also move from left to right


