Tecnai on-line help manual -- Alignments - UT Southwestern
Tecnai on-line help manual -- Alignments - UT Southwestern
Tecnai on-line help manual -- Alignments - UT Southwestern
- No tags were found...
Create successful ePaper yourself
Turn your PDF publications into a flip-book with our unique Google optimized e-Paper software.
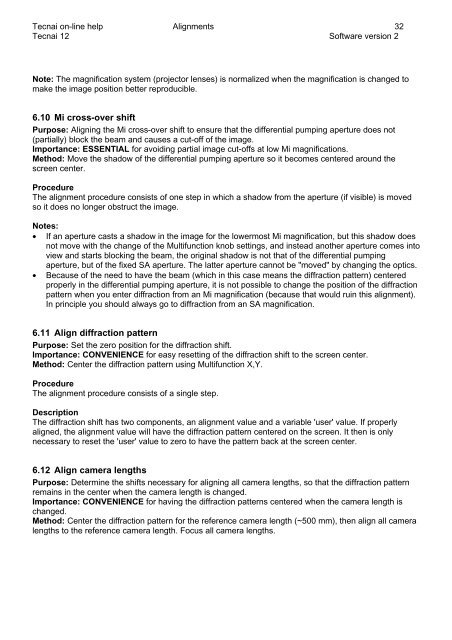
<str<strong>on</strong>g>Tecnai</str<strong>on</strong>g> <strong>on</strong>-<strong>line</strong> <strong>help</strong> <strong>Alignments</strong> 32<str<strong>on</strong>g>Tecnai</str<strong>on</strong>g> 12 Software versi<strong>on</strong> 2Note: The magnificati<strong>on</strong> system (projector lenses) is normalized when the magnificati<strong>on</strong> is changed tomake the image positi<strong>on</strong> better reproducible.6.10 Mi cross-over shiftPurpose: Aligning the Mi cross-over shift to ensure that the differential pumping aperture does not(partially) block the beam and causes a cut-off of the image.Importance: ESSENTIAL for avoiding partial image cut-offs at low Mi magnificati<strong>on</strong>s.Method: Move the shadow of the differential pumping aperture so it becomes centered around thescreen center.ProcedureThe alignment procedure c<strong>on</strong>sists of <strong>on</strong>e step in which a shadow from the aperture (if visible) is movedso it does no l<strong>on</strong>ger obstruct the image.Notes:• If an aperture casts a shadow in the image for the lowermost Mi magnificati<strong>on</strong>, but this shadow doesnot move with the change of the Multifuncti<strong>on</strong> knob settings, and instead another aperture comes intoview and starts blocking the beam, the original shadow is not that of the differential pumpingaperture, but of the fixed SA aperture. The latter aperture cannot be "moved" by changing the optics.• Because of the need to have the beam (which in this case means the diffracti<strong>on</strong> pattern) centeredproperly in the differential pumping aperture, it is not possible to change the positi<strong>on</strong> of the diffracti<strong>on</strong>pattern when you enter diffracti<strong>on</strong> from an Mi magnificati<strong>on</strong> (because that would ruin this alignment).In principle you should always go to diffracti<strong>on</strong> from an SA magnificati<strong>on</strong>.6.11 Align diffracti<strong>on</strong> patternPurpose: Set the zero positi<strong>on</strong> for the diffracti<strong>on</strong> shift.Importance: CONVENIENCE for easy resetting of the diffracti<strong>on</strong> shift to the screen center.Method: Center the diffracti<strong>on</strong> pattern using Multifuncti<strong>on</strong> X,Y.ProcedureThe alignment procedure c<strong>on</strong>sists of a single step.Descripti<strong>on</strong>The diffracti<strong>on</strong> shift has two comp<strong>on</strong>ents, an alignment value and a variable 'user' value. If properlyaligned, the alignment value will have the diffracti<strong>on</strong> pattern centered <strong>on</strong> the screen. It then is <strong>on</strong>lynecessary to reset the 'user' value to zero to have the pattern back at the screen center.6.12 Align camera lengthsPurpose: Determine the shifts necessary for aligning all camera lengths, so that the diffracti<strong>on</strong> patternremains in the center when the camera length is changed.Importance: CONVENIENCE for having the diffracti<strong>on</strong> patterns centered when the camera length ischanged.Method: Center the diffracti<strong>on</strong> pattern for the reference camera length (~500 mm), then align all cameralengths to the reference camera length. Focus all camera lengths.


