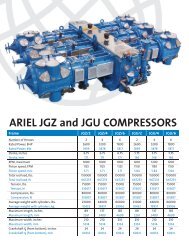
Heavy Duty Balanced Opposed Compressors
Heavy Duty Balanced Opposed Compressors
Heavy Duty Balanced Opposed Compressors

You also want an ePaper? Increase the reach of your titles
YUMPU automatically turns print PDFs into web optimized ePapers that Google loves.
FOR MODELS: JG AND JGA SECTION 5 - MAINTENANCE<br />
Oil O-Ring<br />
Before<br />
Assembly<br />
Sprocket<br />
Shim If<br />
Necessary<br />
FIGURE 5-8: ECCENTRIC VERNIER - CHAIN IDLER SPROCKET (SELF-ALIGNING SPROCKET) - TYPICAL<br />
Lube Oil Pump Chain Sprocket Replacement<br />
Capscrew (2)<br />
Stat-O-Seal<br />
Washer<br />
Locknut<br />
1. Refer to Figure 5-9:.<br />
2. Remove all piping from the pump. Remove fasteners from pump mounting<br />
flange and the pump with sprocket will come free through the hole in the end<br />
cover after the removal of the chain.<br />
3. With a good machinist rule, measure the exact distance from the sprocket drive<br />
face to the pump mounting flange face, in order to position the new sprocket.<br />
Note this measurement for future reference.<br />
4. With the oil pump on a bench, use an Allen Wrench to remove the sprocket set<br />
screws; then, pull the sprocket from its shaft.<br />
5. Remove the Woodruff No. 204 or square key, 3/16 x 1 inches (4.8 x 25 mm)<br />
long, from the shaft and file the shaft to smooth out any burrs raised by the cup<br />
point of the set screw.<br />
6. Install a new key, a No. 204 Woodruff for 2- & 4-throw units or a square 3/16 x 1<br />
inches (4.8 x 25 mm) long for 6-throw units, after first checking to make sure the<br />
key will fit into the new sprocket. If the key is too thick, it can be polished with an<br />
emery cloth on a flat surface until it can easily slide into the notch. If may also be<br />
a little high and require filing of the top edge.<br />
7. Install a new sprocket to the original measurement between the sprocket drive<br />
face and the pump mounting flange face. When it is in position, tighten the set<br />
screws.<br />
8. Install new gaskets. Before reinstalling the pump, apply an anti-seize lubricant to<br />
the gasket surfaces. This will aid in easy removal at a later date.<br />
9. Reinstall the pump onto the end cover. Check the alignment to crankshaft drive<br />
sprocket, with crankshaft centered in end play, using a straight edge to within<br />
1/32 inch (1 mm). If not in alignment, adjust sprocket position as necessary.<br />
11/01 PAGE 5 - 15