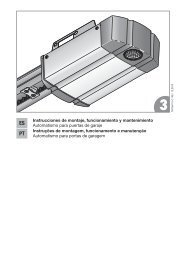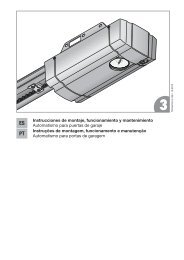
Automatismo para puerta corredera LineaMatic - Hörmann
Automatismo para puerta corredera LineaMatic - Hörmann
Automatismo para puerta corredera LineaMatic - Hörmann

Create successful ePaper yourself
Turn your PDF publications into a flip-book with our unique Google optimized e-Paper software.
ENGLISH<br />
4.4 Connecting the mains lead<br />
Mains connection is made directly at the plug terminal to the<br />
transformer via the NYY underground cable (see Figure 2.4).<br />
Follow the safety instructions in Electrical connection on<br />
page 25.<br />
4.5 Fitting the print bracket<br />
1. Fasten the print bracket using the two screws loosened<br />
earlier B , as well as two additional screws from the<br />
scope of delivery (see Figure 2.5).<br />
2. Re-plug the connecting terminals.<br />
4.6 Fitting the magnet bracket<br />
1. Push the gate by hand into the CLOSE end-of-travel<br />
position.<br />
2. Fully preassemble the supplied magnet slide in the centre<br />
position (see Figure 2.6).<br />
3. Install the toothed track clip on the toothed track in such<br />
a manner that the magnet is positioned opposite the reed<br />
contact in the print bracket of the operator housing,<br />
offset by approx. 20 mm, when the gate is closed.<br />
Note:<br />
If you are unable to push the gate easily into the required<br />
CLOSE end-of-travel position, check the gate mechanics for<br />
use with the sliding gate operator (Safety instructions for<br />
fitting, page 22).<br />
4.7 Locking the operator<br />
ff The operator is engaged once locked. The motor must<br />
be slightly raised when the mechanism is turned to the<br />
lock position (see Figure 3).<br />
4.8 Electrical connection<br />
Danger<br />
Dangerous electrical voltage<br />
Mains voltage is necessary for operating this device.<br />
Improper use can cause electrical shocks which can lead to<br />
death or serious injuries.<br />
ff Electrical connections may only be made by a qualified<br />
electrician.<br />
ff Always disconnect the operator from the power supply<br />
before performing any work on the gate system.<br />
ff The on-site electrical installation must comply with the<br />
respective safety regulations.<br />
ff All the cables must be inserted into the control unit<br />
from below and free from distortion.<br />
4.9 Connecting standard components<br />
Mains connection is made directly at the plug terminal to the<br />
transformer via the NYY underground cable (see Figure 2.4).<br />
4.10 Connecting additional components/accessories<br />
The total consumed current may be max. 500 mA when<br />
connecting accessories at the following terminals:<br />
• 24 V=<br />
• SE3/LS<br />
• Ext. radio<br />
• SE1/SE2<br />
4.10.1 Connecting an external radio receiver*<br />
ff<br />
See Figure 4.1<br />
(*Accessory, not included as standard equipment!)<br />
ff The wires of the external radio receiver should be<br />
connected as follows:<br />
–– GN to terminal 20 (0 V)<br />
–– WH to terminal 21 (channel 1 signal)<br />
–– BN to terminal 5 (+24 V)<br />
–– YE to terminal 23 (channel 2 signal for partial<br />
opening). Only with a 2-channel receiver.<br />
Note:<br />
The aerial wire of external radio receivers should not come<br />
into contact with metal objects (nails, bracing, etc.). The best<br />
orientation to achieve an optimum range must be established<br />
by trial and error. When used at the same time, GSM 900<br />
mobile phones can affect the range of the radio remote<br />
control.<br />
4.10.2 Connecting external buttons*<br />
ff<br />
See Figure 4.2<br />
(*Accessory, not included as standard equipment!)<br />
One or more buttons with normally open contacts (volt-free),<br />
e.g. key switches, can be connected in <strong>para</strong>llel, max. lead<br />
length 10 m.<br />
Impulse control<br />
ff<br />
First contact to terminal 21<br />
ff<br />
Second contact to terminal 20<br />
Partial opening:<br />
ff<br />
First contact to terminal 23<br />
ff<br />
Second contact to terminal 20<br />
Note:<br />
If auxiliary voltage is needed for an external button, then a<br />
voltage of +24 V DC is available for this at terminal 5 (against<br />
terminal 20 = 0 V).<br />
CAUTION<br />
Damage to the electronics caused by external voltage<br />
External voltage on the connecting terminals of the control<br />
will destroy the electronics.<br />
ff Lay the operator cables in an installation system that is<br />
se<strong>para</strong>te from the mains supply.<br />
ff If laying cables in the ground, use an underground<br />
cable (NYY) (see Figure 1).<br />
TR10A059-C RE / 10.2008 25